
How to Set Up a Simple Outdoor Tinkerspace for Creative Summer Play
/
SCROLL TO THE BOTTOM FOR LINKS
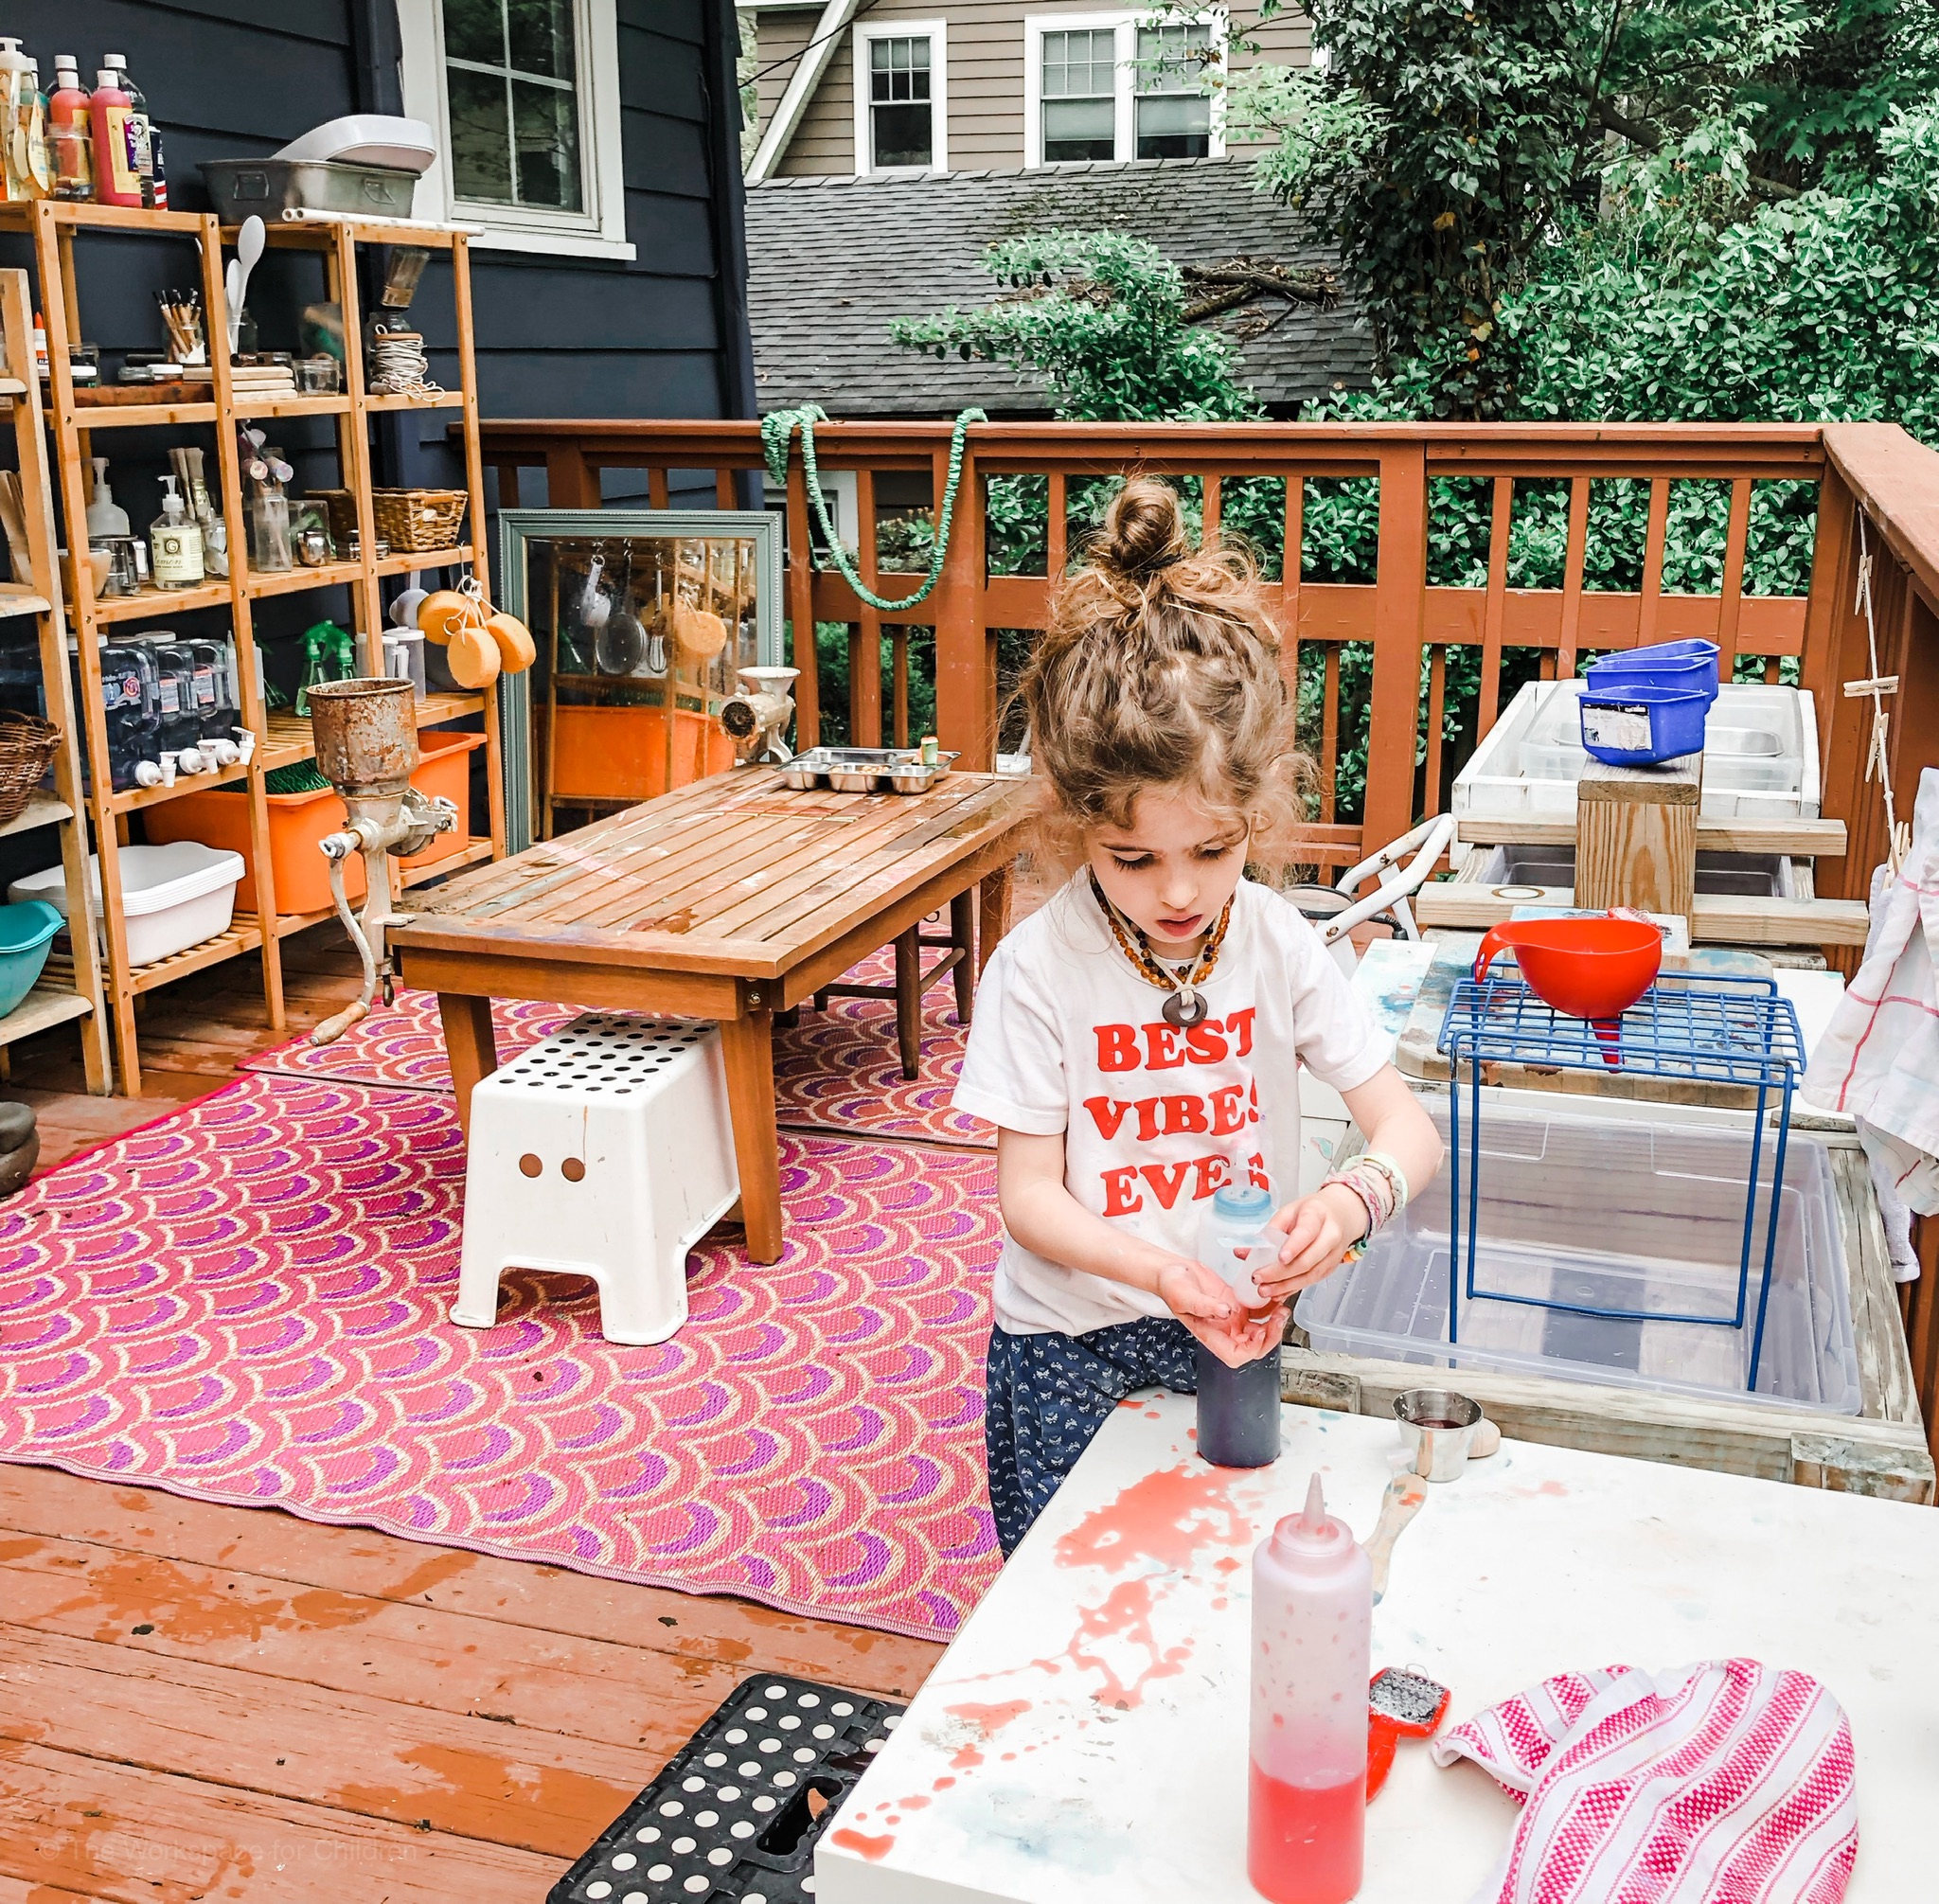
Our tinkerspace is a designated area for messy play, sensory exploration, building, tinkering, and pretending. It’s an outdoor studio where my children and their friends gather to create. Back there, there’s always something unfolding—learning, negotiating, confidence-building, language development, and good old-fashioned play. It gets the kids outside and keeps them there. We’ve had playdates, family moments, and quiet afternoons all in this one space.
The best part? I can hose it all down at the end of the day. The shaving cream, mud, paint, and sawdust rinse right through the cracks of our deck. I like to imagine that one day, far in the future, someone will tear up this deck and discover layers of glitter and magic—remnants of years spent growing and creating in our tinkerspace.
Before I get into the logistics of creating your own, I want to tell you this: Your space does not need to look like mine. Start where you are. Keep it very simple. You do not need a large, intricate setup for this to be a meaningful experience for your family.
A single water table or sensory bin in a designated area is enough. Add to it gradually—as you feel ready and as your children grow into it.
And please—don’t buy all the things and set them all out at once. Start small and let your space grow with you.
Your children will likely move between running around and coming back to tinker. That’s okay. They’re not wired to focus on one thing for long stretches of time—and they don’t need to be.
THE LOGISTICS:
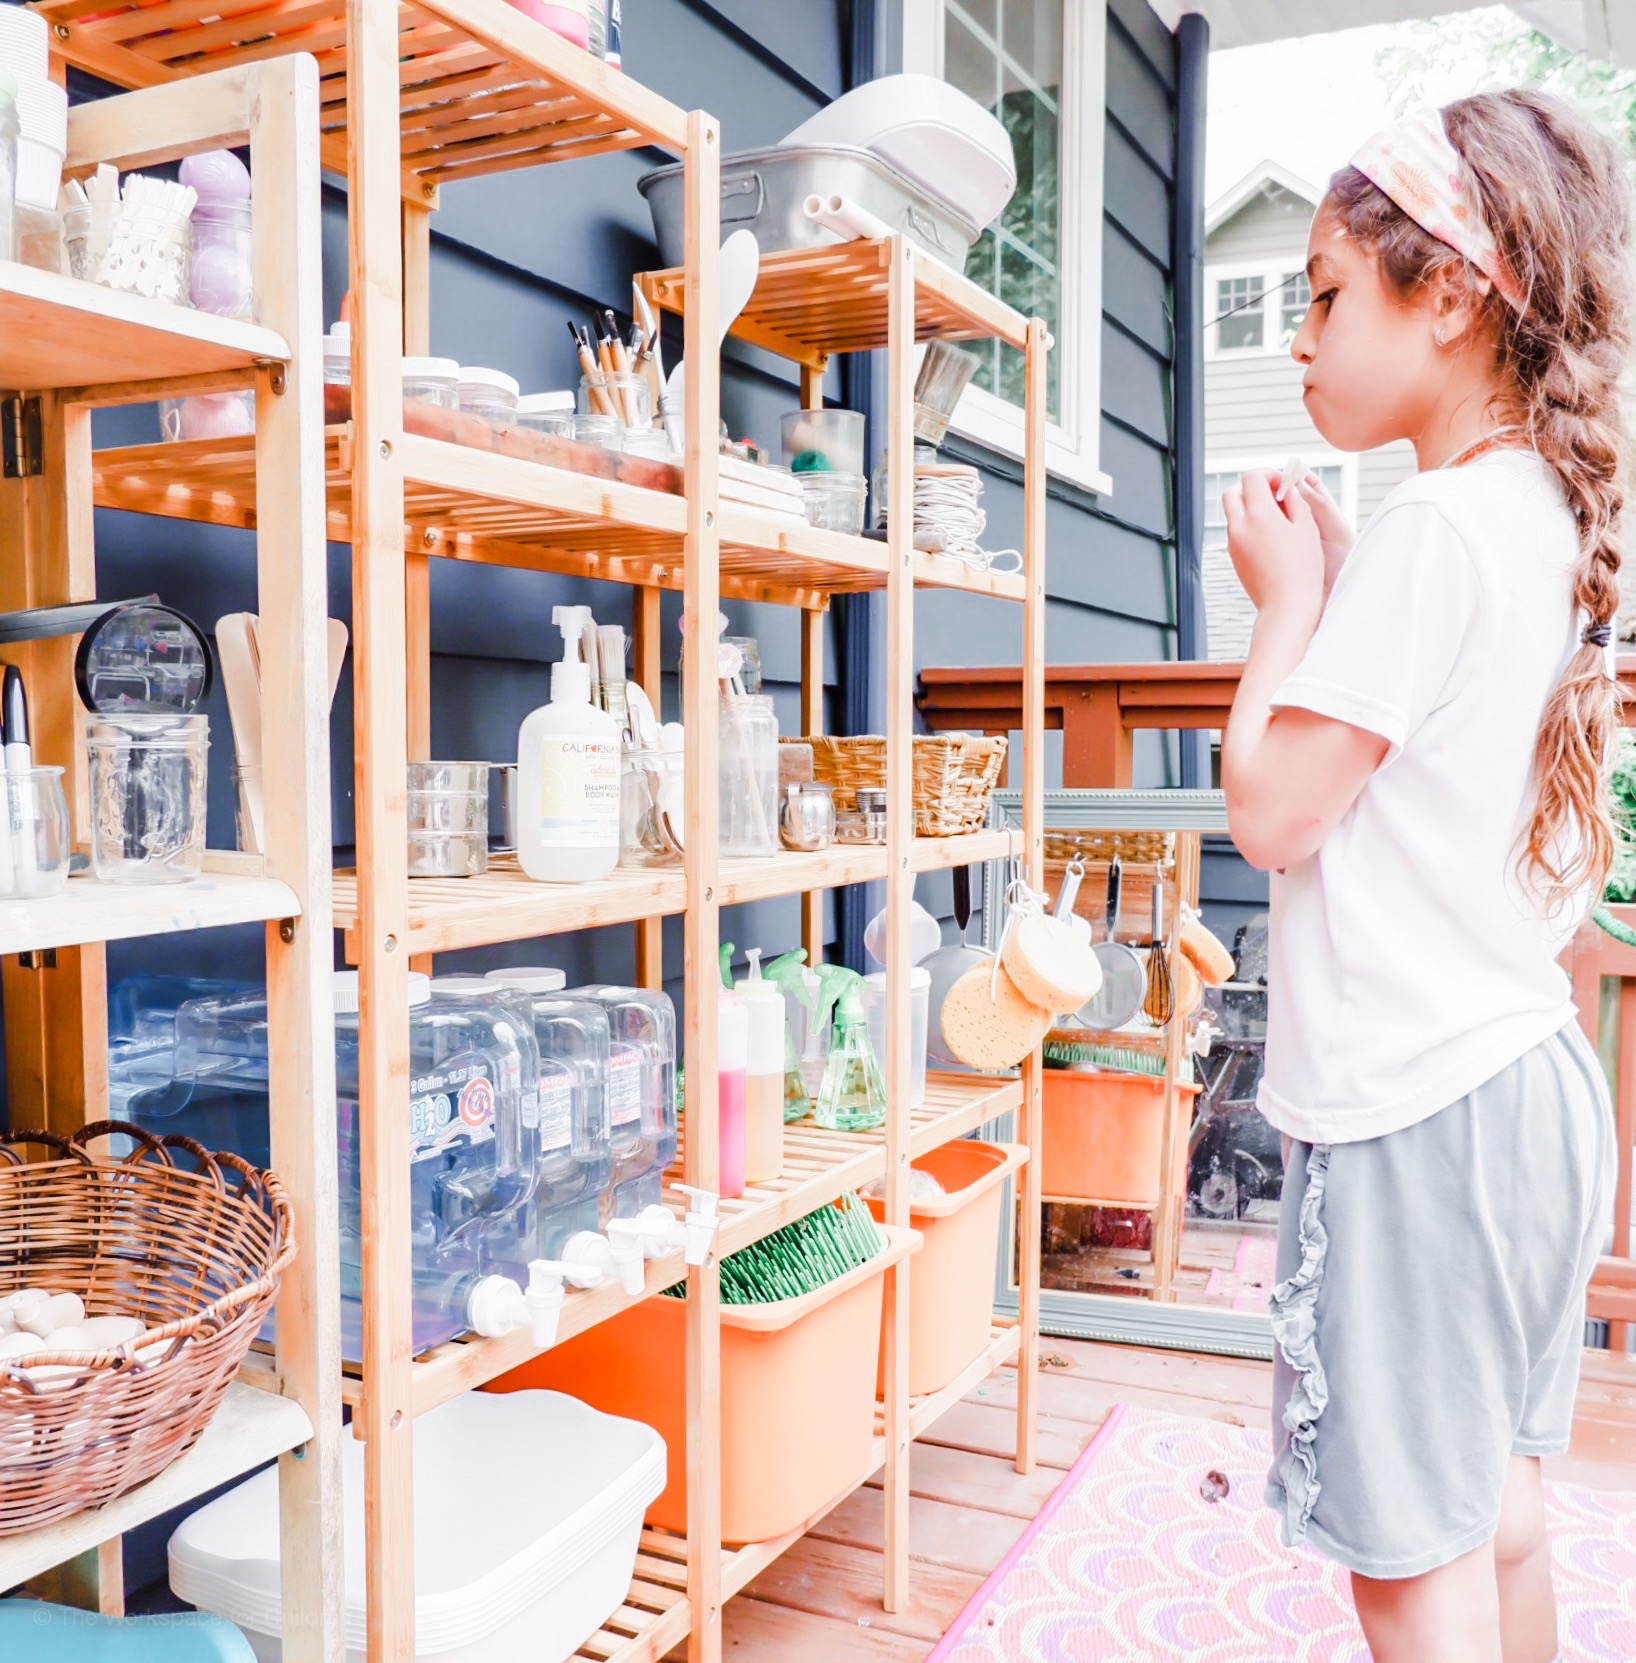
I set up our tinkerspace at the first signs of spring and pack it away before the first major snowfall. We have a small roof overhang that protects our main materials shelf, but the weather still affects it. Most of the space is fine in wet weather, but I’m careful about dumping out any standing water to avoid mosquitos and extra wear and tear. If a big storm is coming, I’ll bring in anything that might get damaged and double-check that our mirror is secure and safe.
I try not to overthink it. I know the weather and daily use will cause some wear—and that’s okay. This space is meant to be used, not just admired.
If you don’t have any outdoor cover, a closed shelving unit or plastic storage bin can help protect your materials.
A FEW GROUND RULES:
We’re pretty relaxed about rules out here. As long as the kids are using the materials creatively, not hurting anyone, and not destroying anything, I let them go for it.
That said, just like with indoor play, the younger the child, the fewer materials I put out. The setup needs to match their interests and developmental stage. When my kids were little, I’d never leave out an entire bag of baking soda. Now that they’re older, it works.
Things like paint, shaving cream, and baking soda live on the top shelf. When friends are over, the kids know to ask before taking those down.
FOR YOUNG CHILDREN:
You don’t need a big setup to make this work. For toddlers and preschoolers, a few open-ended materials can go a long way. Think:
A water table
A surface to work on
Independent access to water
A mirror
Baby dolls or animal figures
Soap, rags, and a sponge
Of course, it all depends on your child’s interests and your comfort level. Start small. You can always add more later.

CLEAN UP TIME:
At the end of the day, I fill a large bucket with soapy water. We’re lucky to have a hose that reaches our space, which makes the whole process more manageable.
I start by rinsing the easy-to-clean items with a quick swish in the bucket and return them to the shelf. The harder-to-clean materials get tossed into the bucket to soak while the kids help sweep up and put things back where they belong. Then I hose out the buckets, bins, and finally the ground. After that, I return to the soaking items, give them a final clean, and put them away. And yes—sometimes, I hose off the kids, too. Done.
Okay, I know that sounds very streamlined, and the truth is, it gets easier with practice. The more often you and your kids do it, the smoother it becomes. And truly, the hose is a game-changer.
Most days, my kids help with the clean-up. They understand that if they want to use the space, they have to pitch in. Other days, I’ll ask just one of them to help while the others go inside for a shower. It depends on the day, the mood, and the rhythm of our afternoon.
Like anything, there’s a learning curve—and some days it’ll feel harder than others.
And just a reminder: it’s okay to say, “The outdoor space is closed today.” Bikes and scooters are open, and the front yard is open, the backyard is closed today. If it’s not fun or manageable for you, it’s not worth forcing. You get to set the tone.
GETTING YOUR PARTNER ON BOARD:
For years, this space was a point of tension between my husband and me. While I was beaming over the creativity and learning, he was groaning about the state of our deck—which, to be fair, often looked like a preschool exploded on it.
He worried about paint stains, muddy footprints across the living room rug, and the endless trail of sand creeping inside. Meanwhile, I was frustrated that he couldn’t see the value in what our kids were building—literally and figuratively.
Eventually, we met in the middle. I got more intentional about teaching the kids to respect the house—no running inside without checking their hands and feet. And I started doing a quick tidy before he got home, which made the whole thing feel less overwhelming to him.
Over time, the space felt more manageable, and he began to appreciate it. Now he even helps—he builds things for us, offers ideas, and this year he installed a gate so the puppy wouldn’t eat any more paintbrushes (yes, that happened).
HOW DO YOU STORE THE ITEMS YOU’RE NOT USING?
During the off-season, we keep most of our materials in the garage. Art supplies come back inside and are stored with the rest of our indoor materials. It’s a simple system that keeps things organized and easy to access again next spring.

WILL THIS STAIN MY DECK?
It might.
Our deck has definitely experienced its fair share of wear and tear from years of creative play. For our family, it’s worth it. I’m more invested in living in our home than keeping it looking magazine-perfect. But I get that this isn’t for everyone.
If a deck setup doesn’t feel right for you, think creatively—maybe your driveway, patio, or even a tarp-covered area could work just as well. And you can always offer tinkerspace-style activities without committing to a full setup.
STILL HAVE QUESTIONS?
You’re not alone. I’ve been doing this for years, and I still have questions! There’s no perfect way to do this.
Start where you are. Keep it simple. You don’t need to use the space every day—just when it feels manageable and joyful.
Do what feels right for you. Because at the end of the day, your kids will take their cues from you—and if you’re stressed or overwhelmed, no one’s having fun.
Looking for the products we love and some recommendations? See the below graphics!


bar towels / brayers / whisks / graters / funnels / crinkle cutter / strainers / mortar and pestle / pump containers / spray bottles / mallet / condiment cups / mixing bowls / grinder / pitcher / paint brushes

chalk / shaving cream / liquid water colors / shells / soap / mini animals / paint sticks / paint pucks / soft wood blocks / sponges / wood slices
EDITED TO ADD: lots of people have reached out for simple toddler water play tools. There are so many cool and exciting accesories you can buy, but I want to remind you that most toddlers will be throughly busy and entertained with a bucket of water, some sponges and a vessels to pour and scoop with.
Our favorite water play accessories are linked below, but go slow, don’t buy a whole lot of stuff at once, and keep things simple.

Water Table / Droppers / Spray Mister / Dog Mat / Plastic Letters / Hand Mixer Measuring Cups / Baby Doll / Sauce Cups / Soap / Animals / Bath Bombs / Storage Bin /Spray Bottles Dish Cloths / Sponges /Sea Creatures /Bath Tray / Scrub Brushes / Funnels / Vehicles / Water Pants / Scoops / Water Dispenser / Water Bottle Pump
If you made it this far, you’re probably my kind of people—the kind who sees magic in the mess.
If this post resonated with you, I’d love it if you gave it a like, left a comment, or shared it with a friend who might need a little reminder that mess and magic can go hand in hand. Thanks for being part of The Workspace for Children community. x. Lizzie
Have you taken our new Play Personality Quiz?