SIMPLE ART- NOT CRAFT- ACTIVITY FOR CHILDREN

When you think of art with children, you probably think about a “craft”. With crafting, there are specific instructions, materials, and a desired outcome. There is a certain age range for a project and there is a beginning, middle and an end.

When I think about art for children, I think about the process. I think about materials that offer a range of experiences, and how children in different stages in their development will interact with the materials.

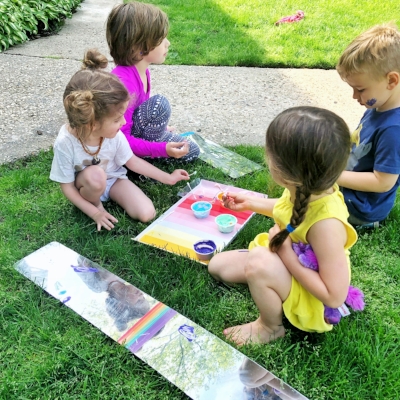
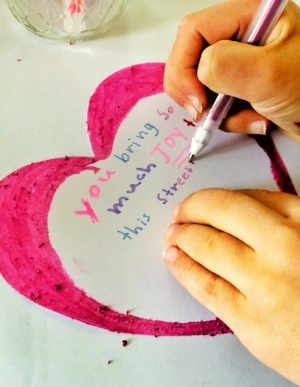
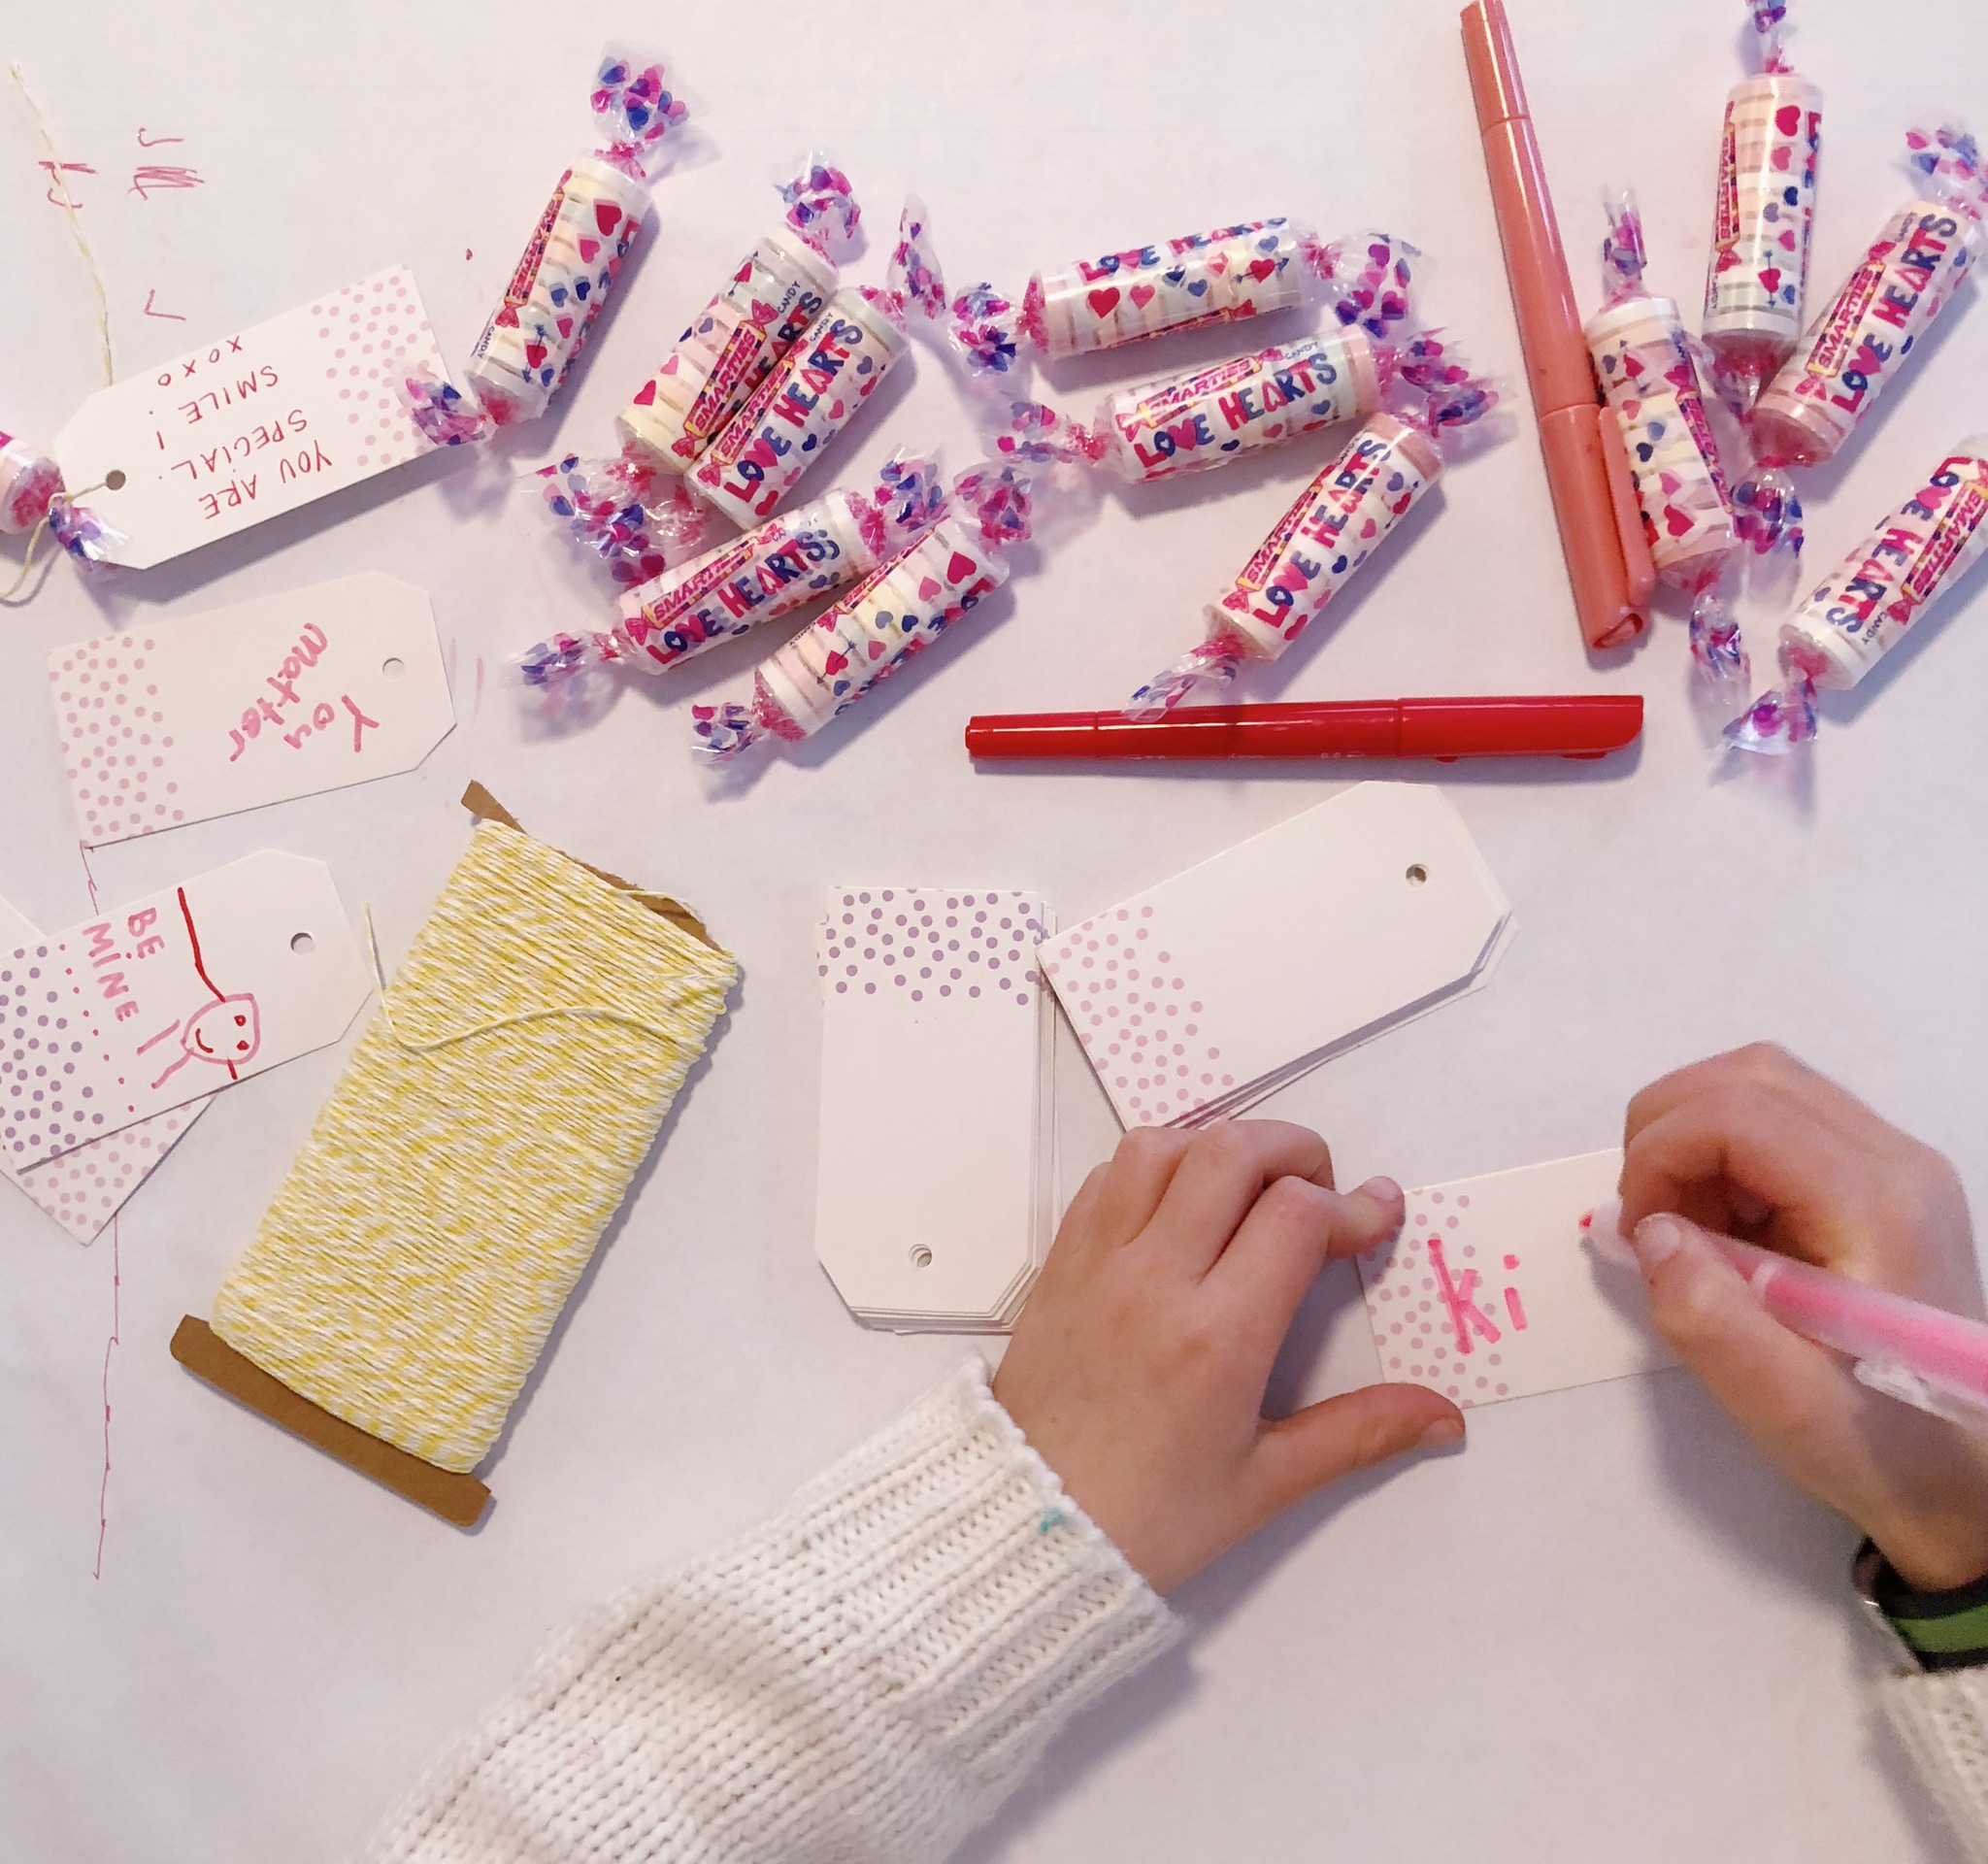
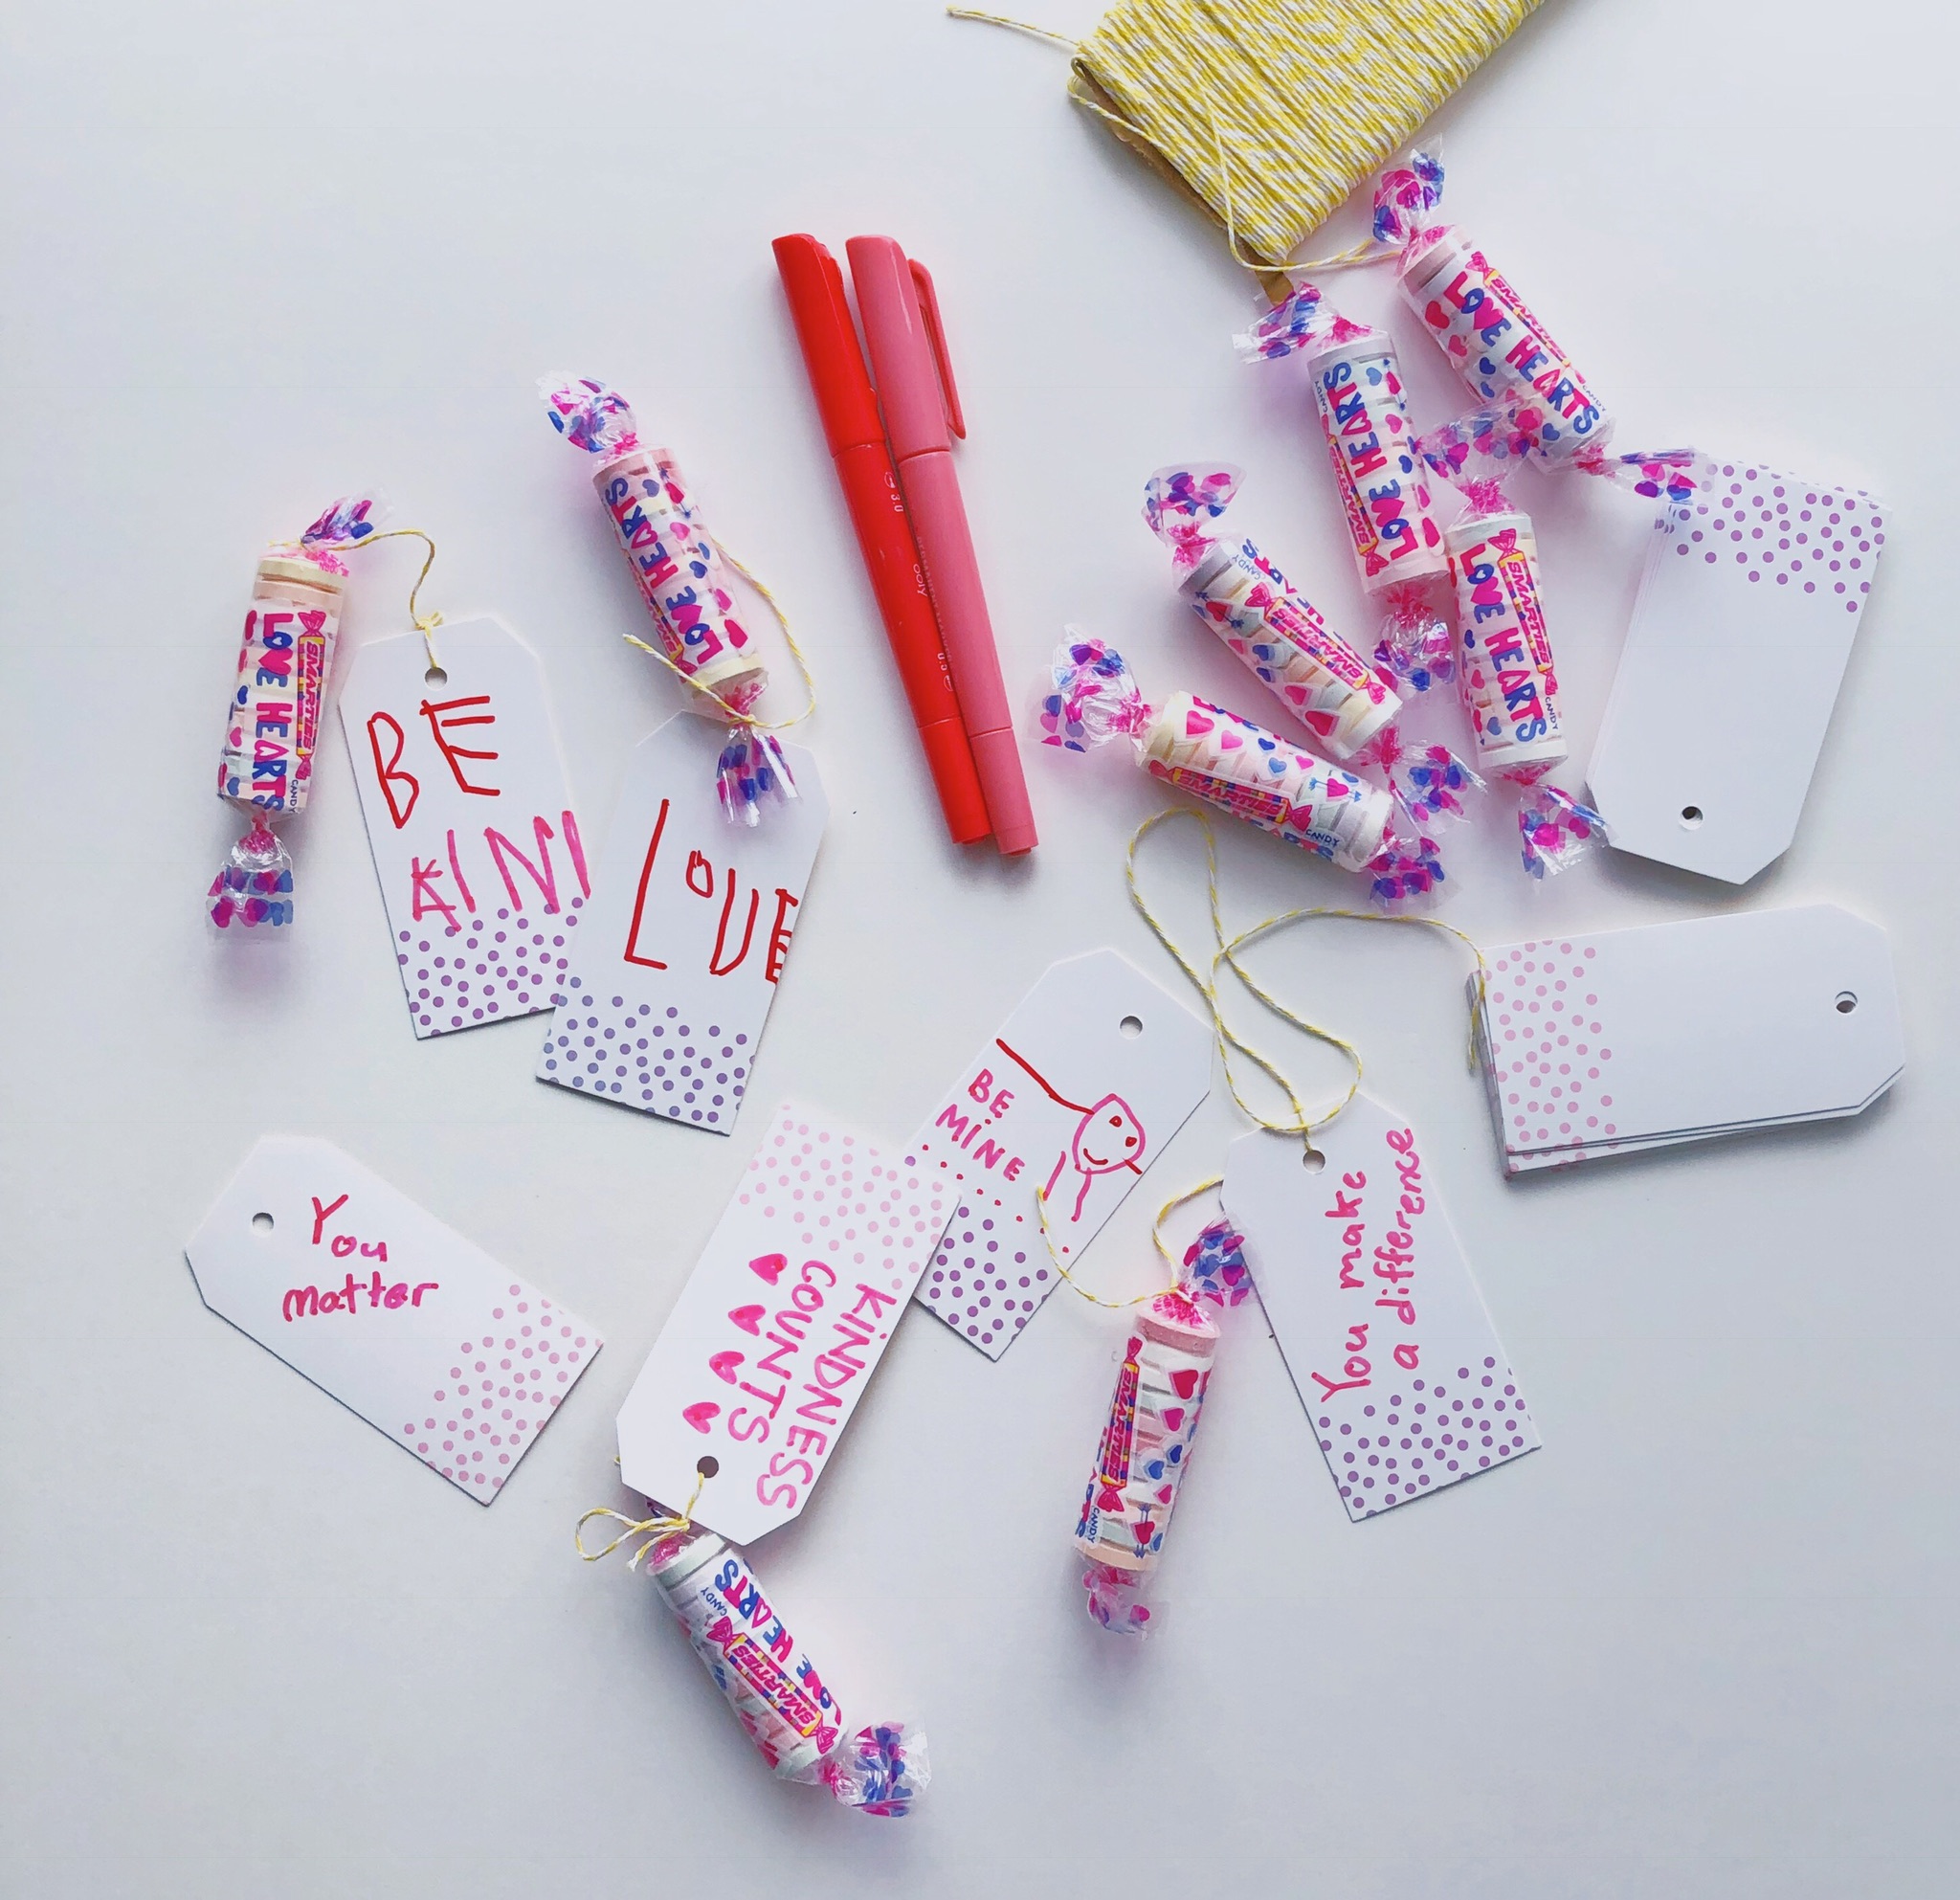
On most afternoons in our home, I set out a snack and a simple invitation to create. When the children arrive after school (often with friends in tow), I like to create an atmosphere where they can relax and unwind from a long day. Even if it is only for a few moments before we all rush off to the next thing, I want them to feel a moment of calm and connection . This simple activity takes only moments to set up, but provides hours of creating for a large age range of children. It is not messy and can be “grazed” on, as the children see fit. There are no directions. The children interact with the materials and create in any way they want.

HOW TO SET UP:

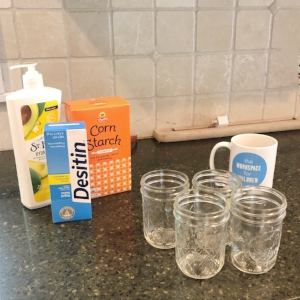
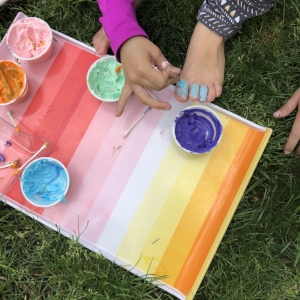
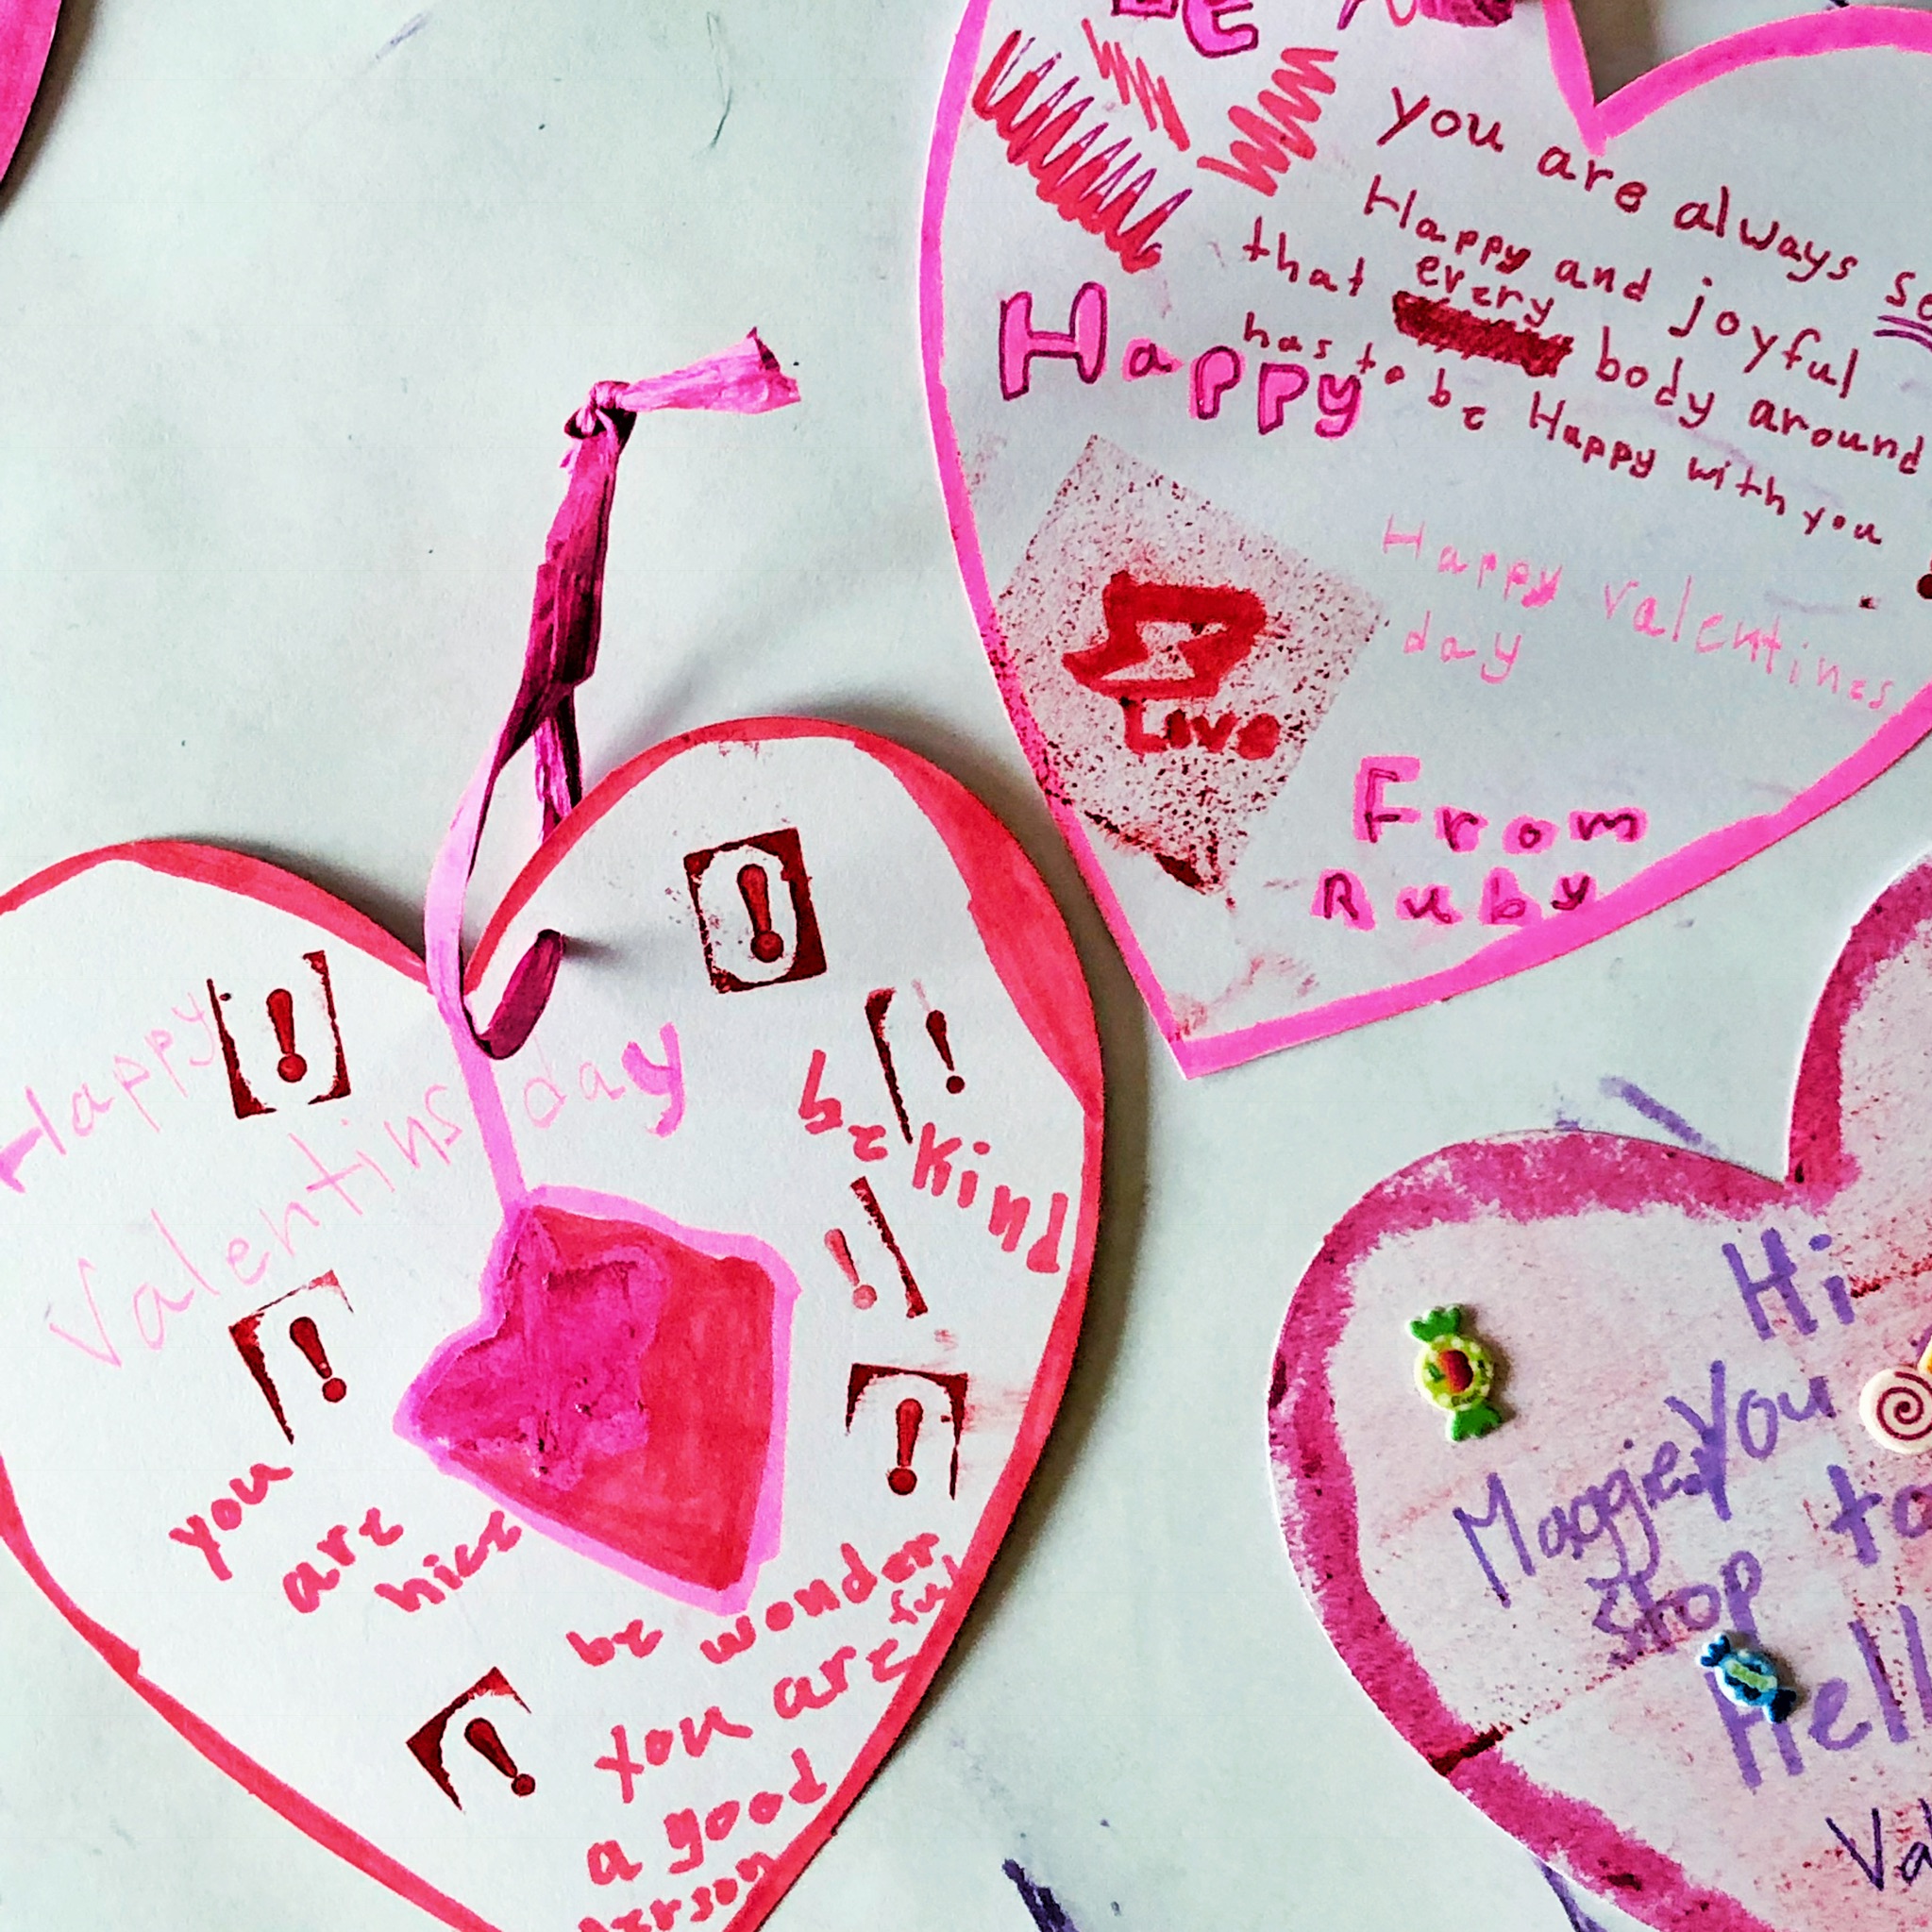
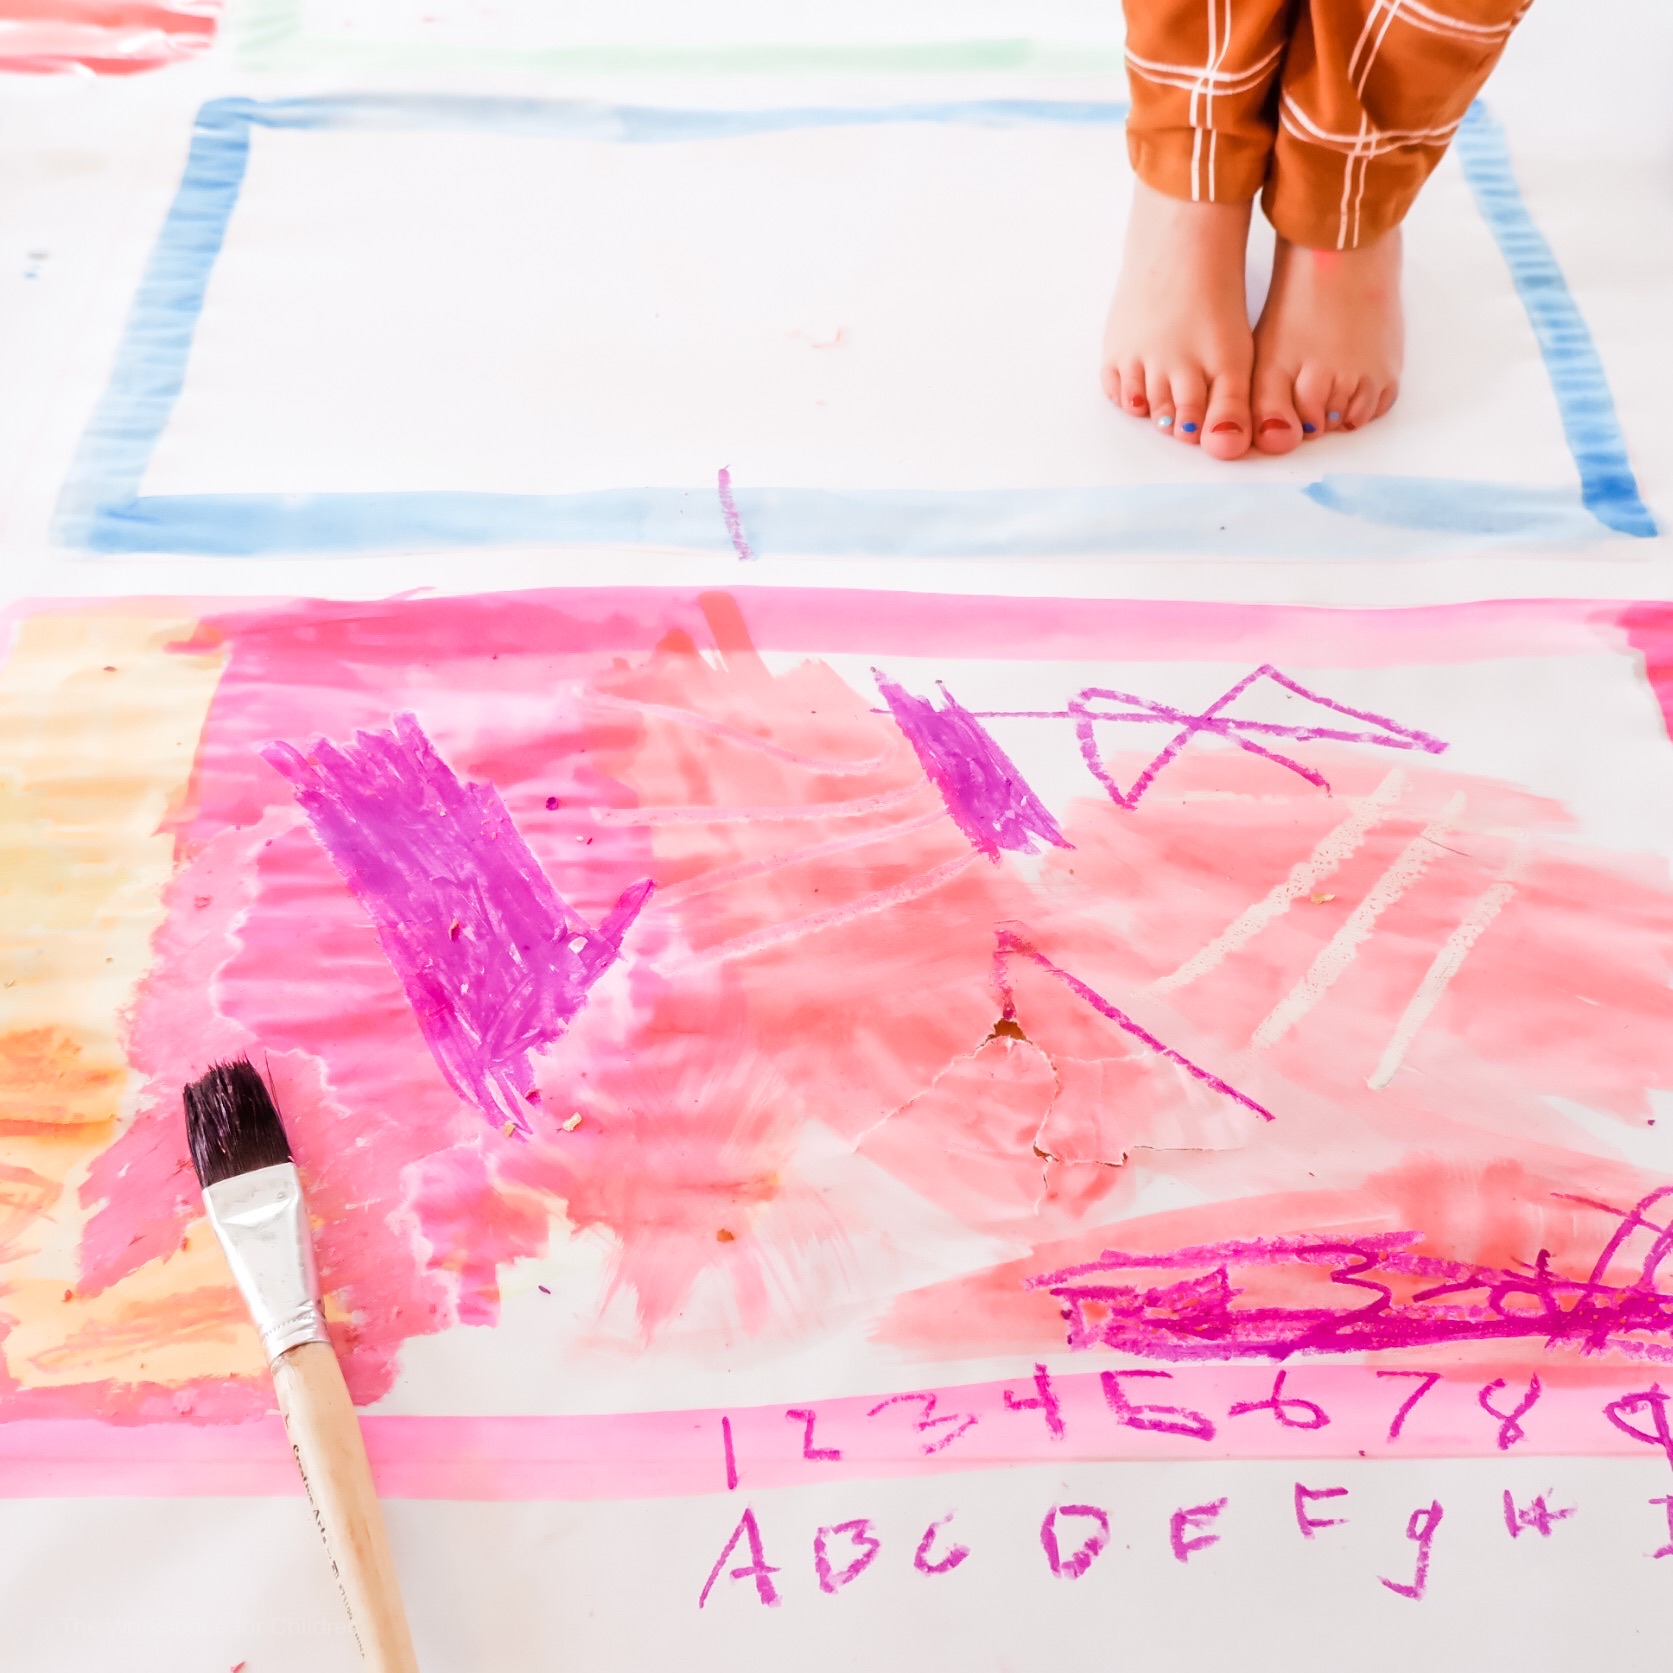
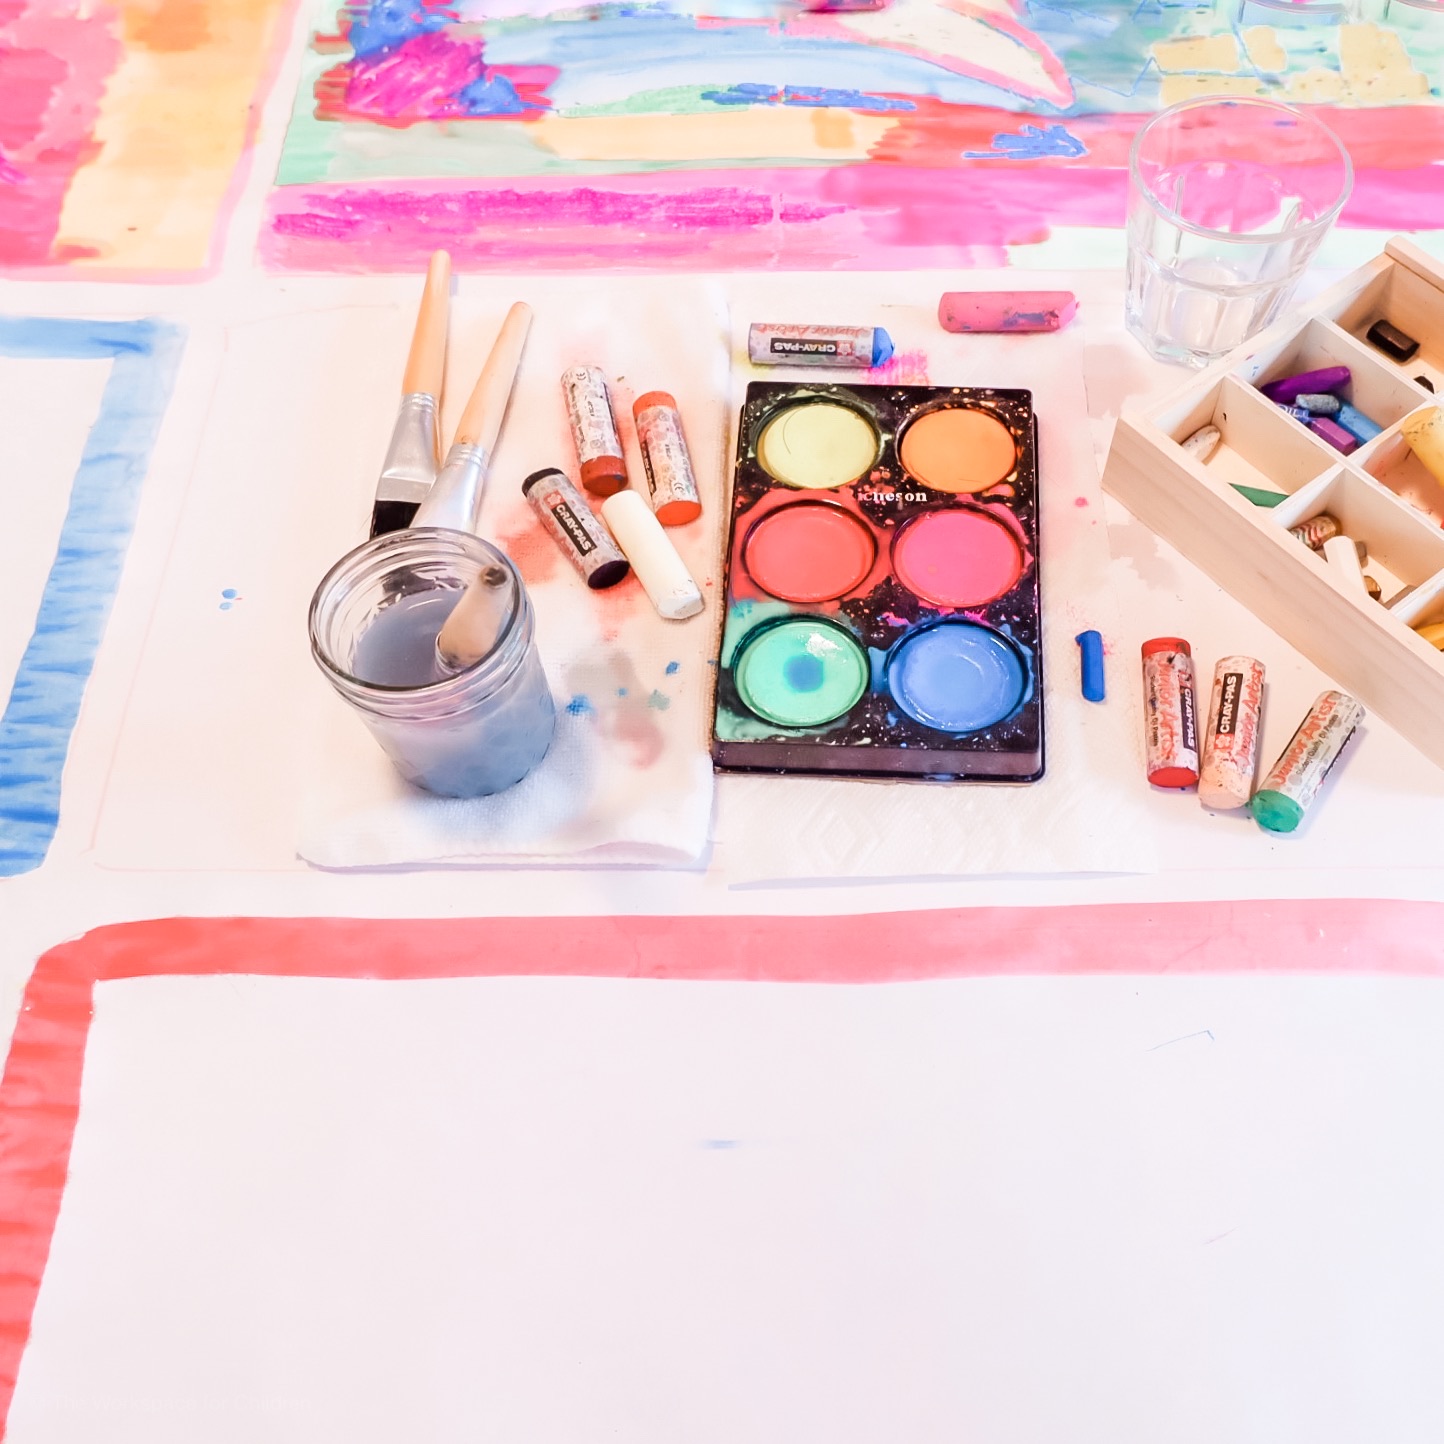
First roll out your butcher paper and cover the table. Tape it down for stability. Next, Find a large tray or book and trace rectangles onto the paper. Why? Sometimes a defined space is more welcoming for children to dive into than a large blank slate. It also just makes for a unique, open ended canvas for creating. Set out your paints and oil pastels and a jar of water and brushes. Keep a towel handy for any spills. Prime your paints by pouring water directly onto the tempra cakes. Allow your child to experiment with the materials. You do not need to give instructions or micro manage the work they are creating. In fact, claim a rectangle for yourself and get lost in the oil pastel. They are so satisfying to rub across the paper. Let your child discover the paint-resist on their own. You do not need to rush in and show them. They joy is in the discovery!

PRO TIPS:

  • Teach your child to swish their brush five times around the paint cake in order to get a rich and vibrant swash of paint.

  • Prime your paints by pouring water directly onto the cake prior to use

  • Put on some chill background music to set the mood. We love John Mayer, Amos Lee, Elizabeth Mitchell, Jack Johnson, and Ray LaMontagne.

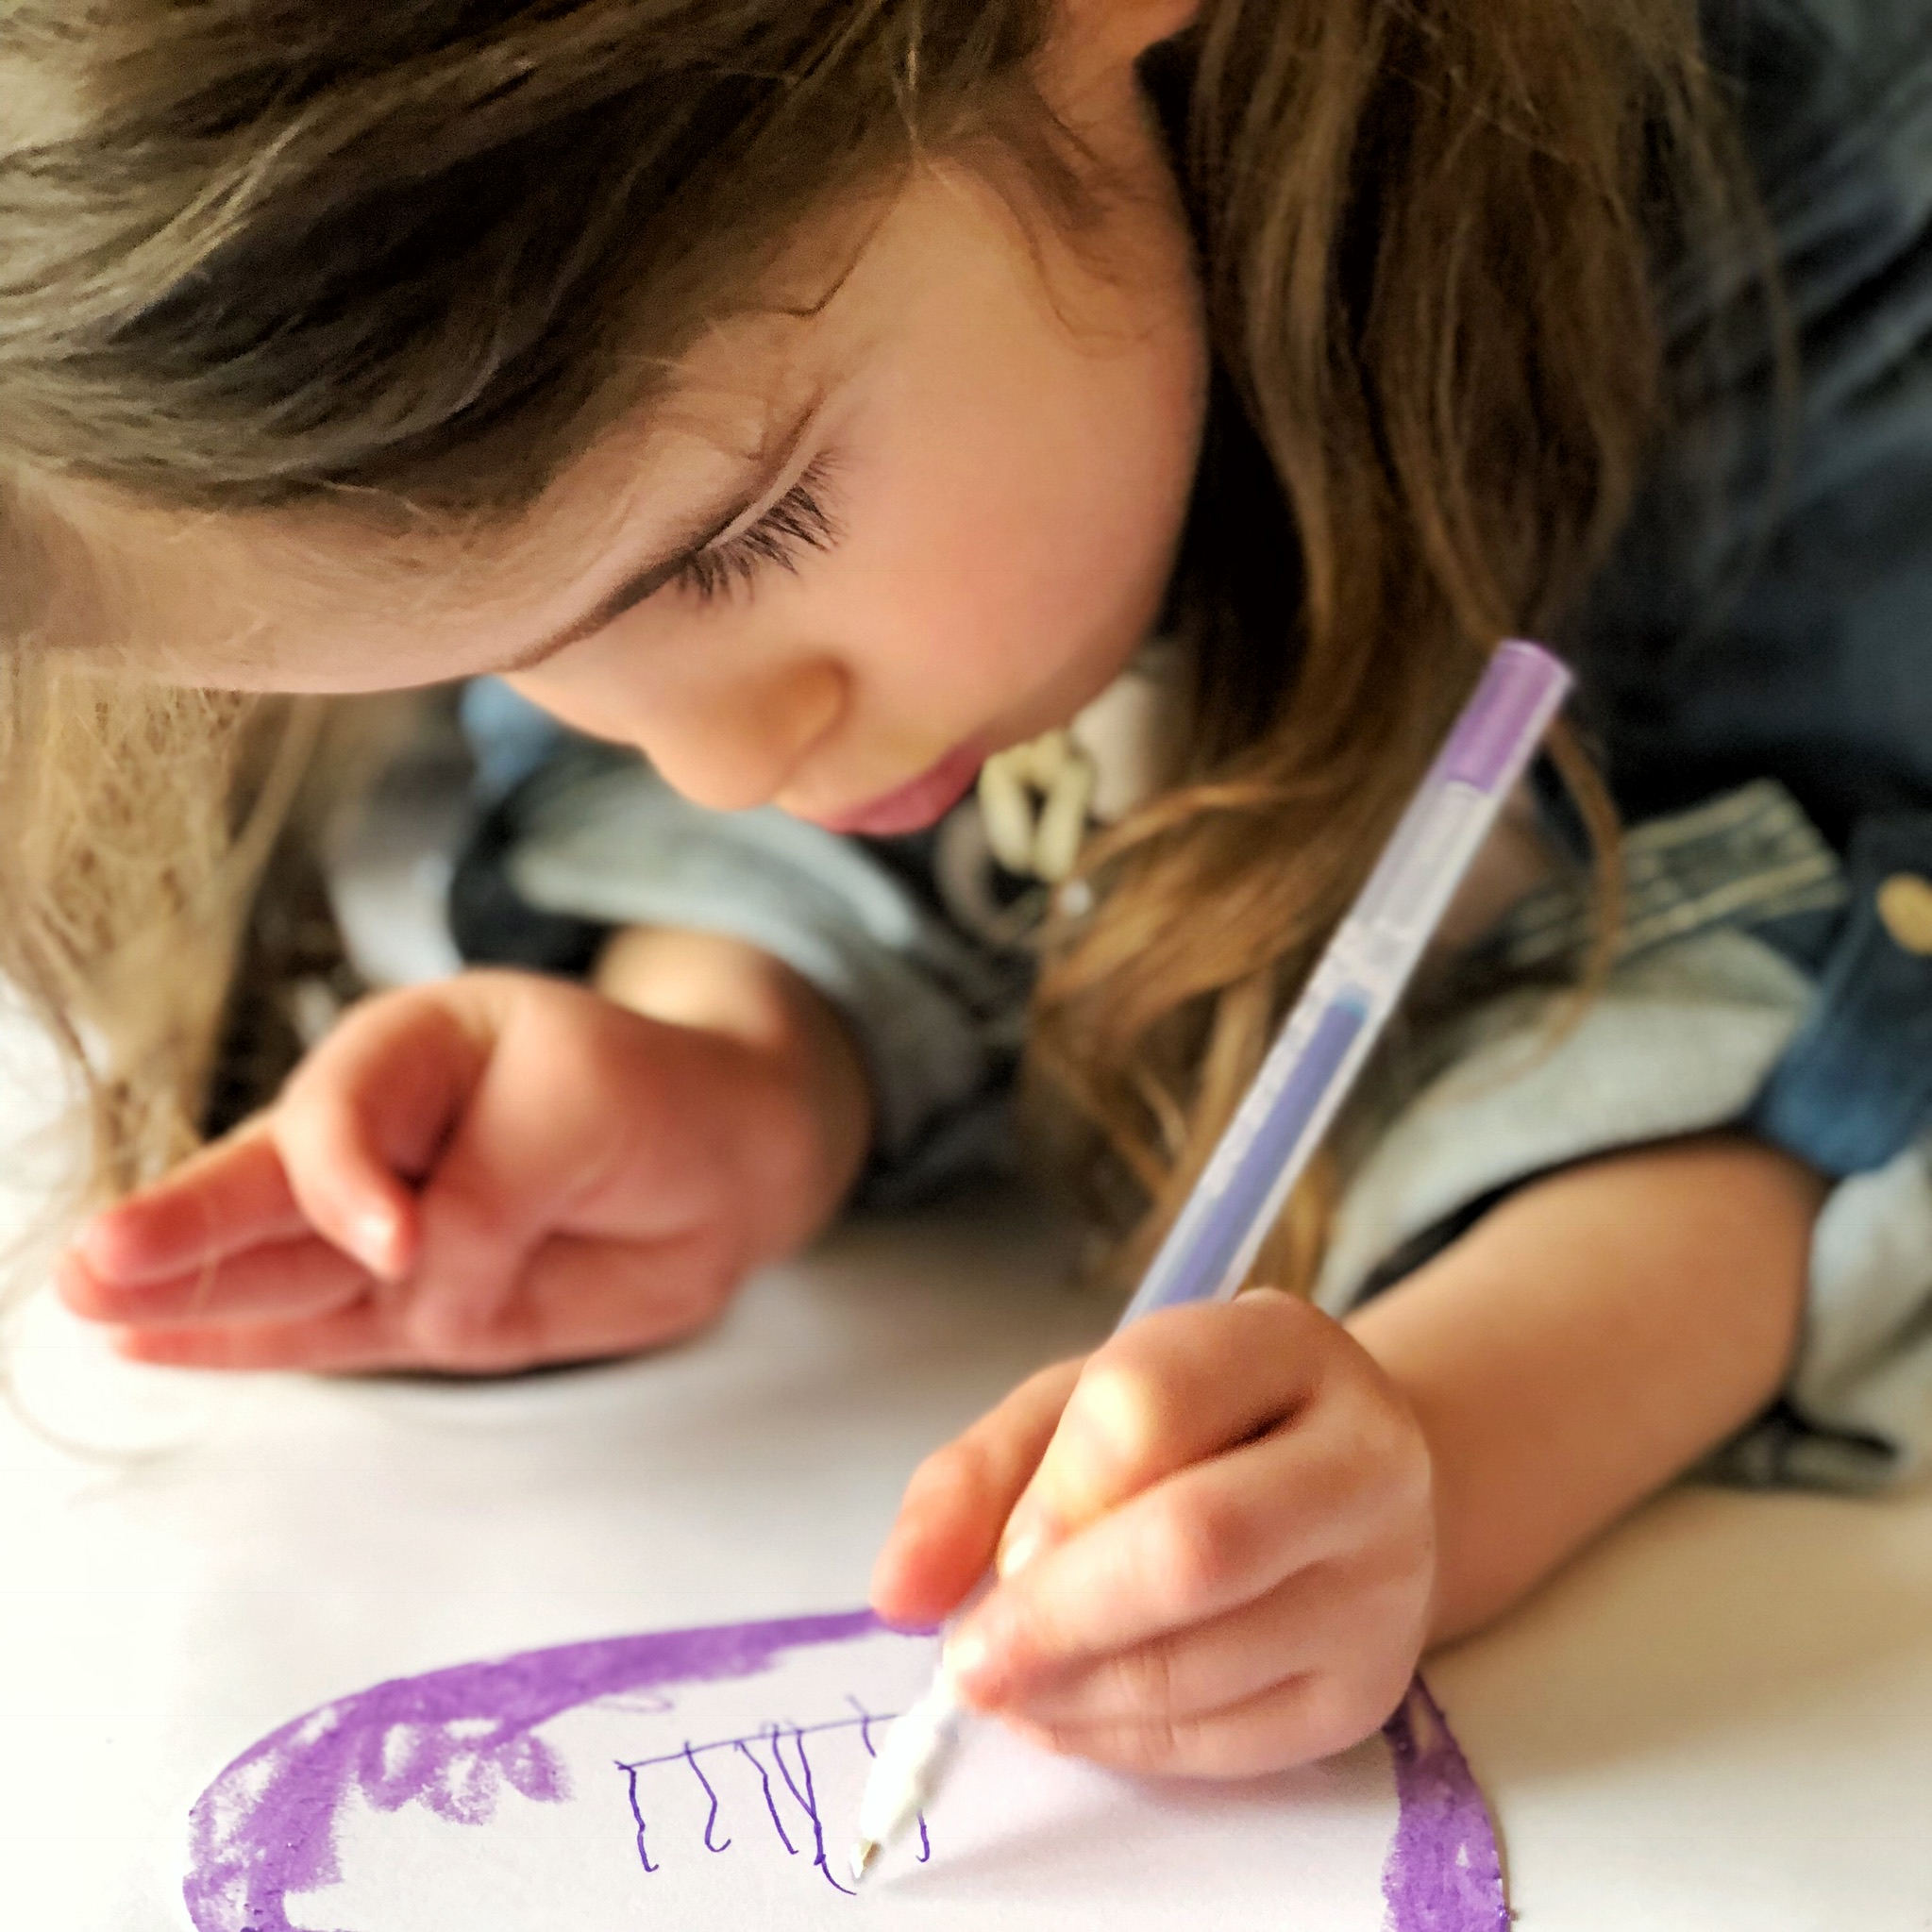
  • Let your child work at his own pace. He might work for a few moments and wander away, then return again in a little while.

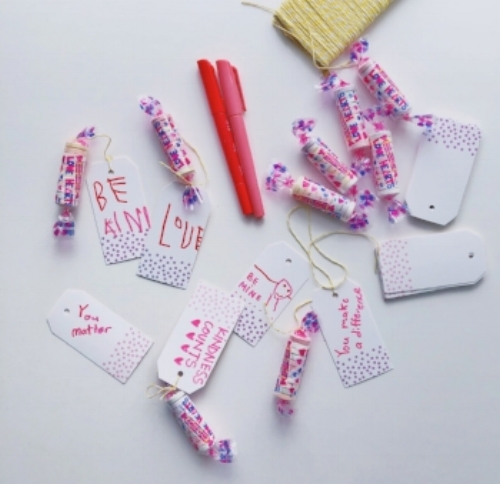
  • Use materials you already own. You can adapt this activity multiple ways to fit your needs. This does not need to be complicated to be engaging.


Read more posts like this one below:

I hope you found this post helpful.  If you want to hear more from me, please be sure to join the conversation over on Instagram.  

-Lizzie 


HOW TO ENCOURAGE BLOCK PLAY AT HOME

IMG_0226 (1).jpg

I love when we all chat about blocks. They are my absolute favorite item for PLAY. Lots of you are purchasing them for your home and classroom. They are certainly an investment, and I want to make sure that your children are actually using them.

Below you will find a simple guide to encouraging block play at home or in your classroom.  Three simple steps.  If you decide to follow them, let me know what works and what does not.  

BLOCK PLAY SIMPLIFIED:

  1. Edit Your Space

  2. Organize The Materials

  3. Hang Out With Your Blocks

EDIT YOUR SPACE:  

Walk out of the room where your blocks live and then walk back in.  What is the first thing you feel when you walk into the room? Is there a designated space for block play? How is that space defined? Is the flooring sturdy and even or is it covered in a lumpy, uneven carpet? 

My first bit of advice is to move some things around to make a designated area for building.  There are two reasons for this.  One, it shows your child that you value block play.  By creating a physical space designed for building, you are helping your child to focus on creating without distraction from his or her thoughts.  Think of it like this.. Do you have a designated space where you work? Maybe a desk or a table that holds your computer, important documents, and some reference books? It's easier than just plopping down in the middle of a chaotic, messy room and pulling out your computer, right? Same thing with building and playing.  

This space does not have to be large, just make sure it's big enough for your child to move around and build without getting in her own way.  If there are little siblings in the picture, it might help to put this space in an area that is protected from unsteady toddlers or speed crawlers.  Maybe you could put a small block shelf in your child's bedroom or perhaps in an area of the house that his little sibling cannot access.  (My sister put her block area in an enclosed pen to keep the little ones out and the builders building! Genius.).

ORGANIZE YOUR MATERIALS:

Screen Shot 2017-12-28 at 2.50.20 PM.png


How do you store your blocks? Are they all dumped into a bin, stuffed behind the trucks and puzzles? You are not alone. I think most homes have an abandoned pile of wooden blocks somewhere in the playroom. I want you to  pull them out and sort them by shape.  Your child can help you or you can grab a coffee and go it alone while listening to an awesome podcast.  I'd go the podcast route, but that's me.  

Once you have them sorted by shape, decide on a shelving system.  My father-in-law built us a custom shelf to house our blocks (love him so much).  You can use a shelf designed for blocks like this one, or use one that you already have.  Better yet, check out your local Facebook swap sites for an IKEA hand me down.  However you decide to obtain a shelf, just get one.  Trust me, it makes all the difference in the world in how your child will use the blocks.  

When you have your shelf in place, lay out the blocks according to shape and size.  You can organize them in a manner that makes sense for you and your child.   I try to make sure the larger, heavier blocks are on the bottom, but I'm not sure it really matters.  The most important thing is that each shape is visually represented and can be easily accessed by the child.  

HANG OUT WITH YOUR BLOCKS:

Huh? Yup. Just do it. (read on)

The hard part is over and all the really great learning and engagement is about to happen.  Invite your child into the space that you have created.  Show her how you've arranged the materials.  Ask her what she might build? Will it be a house for stuffed animals or a parking garage for her race cars?  Will she build flat or will her building be tall? 

With reluctant builders, I might 'pre-build.'  That means I might lay out a very simple structure and ask the child how he can add to it. Then follow his lead.  He adds a rectangle, you do the same.  Try to mirror their block building behavior.  Once they get going, you can slowly step back and let them go.  Remain interested, but do your own thing.  You want to encourage independent play.  

When I notice my children haven't been building a lot, I do one thing and it works EVERY TIME.  I sit in our block area.  I just sit there quietly and read on my phone or read a book to them.  They usually want to go wherever I am.  If I am in our block area, that's where they will be.  If those blocks are organized and displayed in an inviting fashion, they can't resist them.  And that, my friends, that's where the magic happens.  

IMG_0225.jpg

LANGUAGE PROMPTS TO ENCOURAGE BLOCK PLAY:

  • Which shapes will you use first?

  • How can you use these squares to make a long, flat line? How can you use them to make a tall, standing up line?

  • Which blocks would make a sturdy base for your building?

  • How can you make a house for your lovey? Will it be tall or will it be down low? Will it have a roof or a door or will it be open?

  • Can you make a pattern using the blocks?

  • Which block do you like? What do you like about it? How can you use it in a building?

MORE TIPS TO ENCOURAGE BLOCK PLAY:

  • Snap photos of your child's block building on your phone. Print them out and bind them together with a binder ring and a hole puncher.

  • Hang the photos around the block area to inspire your child.

  • Add a small basket of people and a small basket of cars to the block area. See how it changes the play.

  • Encourage your child to make signs for his or her buildings with a basket containing small pencil and papers. Just remind them not to write on the blocks.

IMG_0224.jpg

I could write about the benefits of block play and how to encourage block play for hours and hours.  Do you want to pick my brain? I want to know WHAT you all need help with when using blocks in your home or classroom.  Join the conversation over on Instagram, where I will be answering all of your questions.

WHERE TO BUY UNIT BLOCKS:

Our collection has been built over the course of ten years. Some of ours are from my own childhood. We’ve also added at birthdays and holidays. Wooden blocks are expensive and I do not recommend that you buy a whole ton at once. Your child will be overwhelmed, and you will be out a lot of money .

Here is a link to a great starter set of wooden unit blocks: CLICK HERE


NEON SALT TRAY

IMG_0522.JPG

Inspired by one of my favorite accounts, @mamapapabubba, I made Sloane this simple salt tray to practice her writing. Want to know how? It took 2 seconds (well, not really, but it felt fast and easy😜)

1. I poured salt in 2 small bowls.

2. Added a squirt of neon watercolor into each and mixed it.

3. Let dry (I dried mine in a low oven because I’m impatient.) 4. Mix the colors together on a clear tray and put it on the light table 💫

It was pretty impossible to resist. All three kids were writing and designing (and fighting and elbowing for space around the tray). How will you inspire learning in your home or classroom today? .

Everything you need is linked RIGHT HERE in my Amazon Shop

Want to know more about salt tray learning? Pop over to Jen’s Blog to learn more.

Happy Playing!

-Lizzie

PREPARING YOUR KIDS WHEN YOU TRAVEL WITHOUT THEM

Image sourced from Pinterest

Image sourced from Pinterest

My husband and I recently had the opportunity to take a quick trip down to Mexico without the kids.  It was blissful.  My mom and my in-laws teamed up to conquer our crew and make sure everything ran smoothly in our absence.  My kids are five, eight and ten, so leaving them in someone else's care is WAY easier than it was just a few years ago.  But, as I packed them up, I remembered all of the tips and tricks I used when they were tots, and I am going to share them with you here.  

IMG_0471.JPG

TIP ONE:  Create a simple picture calendar (see photo).  Show your child exactly when you will leave, and when you will return.  Even very small children can benefit from the comfort of knowing "what will happen next".  A calendar of your whereabouts gives them that peace of mind.  

TIP TWO: Leave a note to your child for each day that you are gone. I like to seal them each in individual envelopes to make it more fun.  The note doesn't need to to be extravagant.  Just a line or two telling them that you love them and that you are thinking of them.  You can ask your caregiver to read them a new note at bedtime each night. 

Image sourced from Google

Image sourced from Google

TIP THREE: Make a date to FaceTime or Skype (Put it on the calendar).  This is especially helpful if you are going to be in a different time zone.  Keep your phone call short, just a few minutes is ideal.  Just enough to see your littles and let them see you.  Exchange a few, "I love you's," and one or two exciting things.  You know you child best, so if you think that they can't handle seeing you, skip this tip! If you think you will have the time, pack a quick bedtime story in your suitcase. You can read them their favorite book over FaceTime! 

Traveling away from your children can be anxiety producing, and not without hiccups.  But  if you have the opportuity, get out of your comfort zone, and do it!! You will not regret it.  


HOMEMADE FACE AND BODY PAINT

IMG_0476.JPG

Do you want a simple, easy way to WOW your kids? This face painting activity is so much fun for an outdoor playdate or even a birthday party.  It is so simple to throw together with a few supermarket ingredients that you probably already have on hand.  

IMG_0474.JPG

We used cornstarch, lotion, and diaper cream (zinc oxide).  Mix it up until you get a thick, smooth consistency and add your food coloring! We used gel colors, but any coloring will do.

IMG_0472.JPG

 I loved that the white paste gave a beautiful pastel hue to the paint.  I put our body paint in small containers with q-tips for application.  Have some baby wipes nearby to wipe little hands.  Put out acrylic mirrors (ours are from IKEA)  and you are good to go for an afternoon of fun! 

IMG_0473.JPG
IMG_0475.JPG

Have you tried this activity before? Do you plan to? Head over to Instagram and let me know if you have any questions or comments about this homemade body paint.

-Lizzie 


A TRIP INTO THE FOREST WITH KIDS

IMG_0463.JPG

My children and I try to spend as much time in the forest as we can.  Winter is actually my favorite time to explore (no bugs), but I know most people find the Spring the ideal time for a forest romp.  I'm not an experienced hiker.  To be honest, I am not even really the outdoorsy-type.  But, I love to get my kids playing outside in nature.  We are very lucky to live within minutes of the South Mountain Reservation, with access to deep, dense woods and beautiful trails.  My children have a favorite spot in the woods and we almost always go there.  A few times I have insisted that we try a new spot or hike a new path, but it never works out as well as when I follow their lead, and take them to their favorite spot.  

IMG_0462.JPG


Here's what I've learned over the past few years of regular trips in to the forest with my own kids:

  •  Follow your children's lead, return to familiar spots.  I like the idea that I have the lay of the land.  It gives me more confidence to allow the children to roam.  (I'm always a tiny bit nervous when we are in an area that I am unfamiliar with and they run off to play.)  Remember, nature is always reworking the backdrop so you don't have to.  New trees have fallen, the river has frozen or it is bone-dry.  There are new treasures to discover depending on the weather, so returning to the same spot never gets old.  
  •  Set up camp, even if you don't plan to stay long.  I  bring a sturdy blanket or mat.  The children know where to find me and where to come to rest or snack.  I usually lay out a few pencils and clipboards for writing and drawing, and of course, snacks and water.  Depending on her mood, my youngest will  sit with me or play very nearby where she can see me.  Sometimes she brings her little toy mice and sets them up to play in the leaves and sticks.  
  •  Insist on proper gear.  There is nothing worse than getting all set up, and your kid gets wet or muddied and is crying to go home.  Water pants and proper footwear (although in the summer my crew is almost always barefoot) will keep them warm, dry, and protect them from ticks.  If you know us, you know that all three of my kids have long hair, and a lot of it.  I insist on hair being tied back, and I prefer they wear a hat or head scarf.  
  •  I pack a backpack full of supplies... and the children to carry it.  They are just as responsible for our gear as I am.  I refuse to be their sherpa.  It makes me cranky and you know how that goes.  When mom is not feeling it,  everyone's mood heads south.  The children take turns with the backpack and I pitch in as well.  
  • Know your limits.  Know your children's limits. As moms, we are pretty good at gauging the amount of time we have left until one or all of the kids melt.  Do not push that limit in the woods.  Remember, you still have to hike out.  Pack up camp on a high note, that will make the trek back to the car much more pleasant.  
  • Have rules.  Stick to them. When we are heading in, I always remind the kids that they absolutely MUST listen to me on the FIRST ASK and come the FIRST time I call them.  I want to allow them some freedom, but it is still my most important job to keep them safe.  The forest is wonderful, but not without risk.  I need to know that if I see an off-leash dog or any other questionable situation, that my kids will listen to me without question.  We talk about this every single time we are heading into the woods and there are no opportunities for second chances here.  If they do not comply, we leave.  Immediately.  That is the natural consequence.  It is a huge disappointment, but they must know that I will follow through.  
  • Check for ticks. When we arrive back at our car, the kids are usually spent.  I do a quick tick check before they get in.  And a more thorough one when we return home.    

Do you like to adventure into the forest with your kids? Do you have advice for us? Please share in the comments below.  

-Lizzie 

SPREADING LOVE AND KINDNESS IN HONOR OF VALENTINE'S DAY

IMG_0299.JPG

We are kicking off Valentine's Day (month) with a fantastic giveaway and three simple ways to spread love and kindness within your own community this month. I've teamed up with Primary, Ooly, and Smarties Candy to bring you easy, fun activities to do as a family this month.  Make sure to head over to my Instagram Feed  to for a chance to win a mega-prize from these three brnads!


SURPRISE SOMEONE WITH A HOMEMADE CARD

IMG_0288.JPG

The children and I used  markers, stickers and paint sticks from @weareooly to make simple valentine cards for people in our community.  Here's how we did it...

I invited the children to think of a person in our community (school, neighborhood, town) that could use a little kindness this month.  We had a meaningful discussion about who might need a little extra kindness and why. I was so happy to hear my older two children (8 and 10) talk to one another about people in their schools who are so helpful, but rarely get thanked or recognized. They talked for a while about who they would each choose.  Nate decided on his school art teacher and the P.E. teacher.  Ruby decided to make a card for everyone on our street because she thinks everyone contributes to all the fun we have playing outside together.  My little one (4) didn’t really grasp the concept, but she delighted in making Valentine cards for her friends! When the cards were complete, Ruby loved sneaking her cards into mailboxes up and down our street. 


VALENTINE COOKIES FOR NEIGHBORS AND FRIENDS

IMG_0297.JPG

Later in the week, we made Valentine Cookies.  In an effort to keep things very simple, I purchased premade cookie dough (no shame in my baking game) and baked some heart shaped cookies while the kids were at school.  I colored some white, store-bought frosting with food coloring and  set out some little Valentine candies.  This activity was about gathering to make something for friends and neighbors, and I didn't want to burn myself out by making cookies from scratch, or by baking with the kids.  I like to remake everything and have it ready to go because simple activities make for a more relaxed experience.  The children arrived home from school to find the table set with frosting cookies and candies.  They were ecstatic!  They chomped on cookies, decorated some, and chatted about their day.  

When our cookies were ready to go, we popped them on some festive trays , bundled up, and the children rang doorbells and passed out cookies to brighten the day of our neighbors.  It was REALLY fun! It was also REALLY easy.  


RANDOM ACTS OF SWEETNESS

IMG_0294.JPG

Next up? We left messages of kindness and LOVE in the form of candy... Smarties Candy!! The lovely folks over at Smarties gave us tons of beautiful Valentine candy to leave on doorsteps, in mailboxes and on windshields all over town.  The kids had an awesome time munching on Smarties and writing little messages.  The best part? Sneaking around leaving treats.  As they fell asleep last night, they were all giggles as they thought about how people felt when they discovered candies on their windshields.  


There you have it, three easy ways to celebrate Valentine's Day while spending time together and brightening the days of those in your community.  How will your family celebrate this year? 

This post was sponsored by Primary, Ooly and Smarties.  All thoughts and opinions are my own.  

Thank you for following along. Don't forget to hop over to Instagram to win some great goodies!! 

-Lizzie 

THAT TIME I SENT MY CHILDREN TO THE STORE....ALONE!

Screen Shot 2017-11-13 at 11.41.55 AM.png

I sent my kids to the grocery store with an empty wagon, $35, and a list…here’s what happened.

It was a Sunday afternoon and my youngest child was out with my husband.  I was cleaning the house and getting ready for the week ahead.  My big kids (seven and ten) were underfoot and creating clutter everywhere! (Did I mention I was attempting to clean?)  I was getting ready to meal prep and I was missing a few things. So…. I sent the kids to the store. We live about a half-mile from our town center, which happens to be a quaint little village.  My kids are comfortable out and about without me and I’m at ease with it as well. 

This little trip would shoo them out of my hair, and get me the groceries I needed.  Win-win. I gave them $35, which was more than what they would need, a list, and our wagon.  They were instructed to walk straight to the market and then back home. No stops along the way. 

I trust them to follow my instructions because they’ve practiced for years.  We started when they were very little.  I would allow them to drop something at the next-door neighbor’s house all by themselves when they were three years old.  I would watch through the window as their self-confidence EXPLODED.  As they matured, I provided them with the opportunities to go a little farther.  In the grocery store, I would let them go to another aisle, get one thing and come straight back.  They practiced ordering from the deli counter at a very young age.  They know how to order food in a restaurant and how to ask for directions to the restrooms.  When they were little, and even sometimes now, I watched and stayed nearby to keep them safe. They all learned our phone number and last name just as soon as they could talk.  (I taught them by making up a little song to help them memorize it).  

So, on that Sunday, Nate and Ruby went to the store, filled the wagon with what they needed and returned home. They were happy, I was happy.  Off they went to play. 

Later that evening, I asked them how it went, and what challenges, if any, they ran into.  They looked at each other and giggled.   Then they explained the two main issues they ran into. 

The first problem was that the wagon wouldn’t fit through the narrow doors of the supermarket.  They didn’t know where to park it because they were worried it would get taken or that it might roll away.  They weren’t sure they’d be able to carry the groceries home if they didn’t have the wagon.  After some discussion, they decided on a spot they thought would work and it did. 

The second issue they encountered was when the store was out of our usual brand of whole milk.  They couldn’t decide if they should skip it altogether or buy another kind.  In the end, they decided to purchase another brand.

Neither of these situations are particularly problematic.  Nothing bad would have happened if they had made an alternative decision. The important thing is that they had the opportunity to problem solve in the real world when the stakes were low. 

I’m going to say that again because I think it is so important.  They had the opportunity to problem solve in the real world when the stakes were low.  Why is this so important? I fear that many of our children are not learning how to navigate situations without us or without relying on technology to solve the problem for them.  Giving children the opportunity to practice important life skills when they are young is crucial to how they will handle real life when they are older and the stakes are much, much higher. 

And no, my kids did not have a cell phone to bring on their journey.  If they had one with them, what do you think they would’ve done when they ran into problem number one? They would’ve called me and asked me to solve the problem for them. 

As parents, it is so tempting to keep our children cocooned up as long as we can.  We are hardwired to want to catch them before they fall.  But what if we thought of keeping them safe in another light? What if we thought about letting them fall down while we are still here to help them get up? I want my kids to learn how to fail.  They must know how to face a small problem before they can attempt a big one.  They need to get lost so they can practice finding their way home.  They need to develop confidence in their ability to help themselves.  I am teaching them to trust their own instincts and abilities by giving them the opportunity to practice.

Do you allow your children some independence? I know it is not your typical sighting to see a seven and ten-year-old shopping alone at the grocery store...

Please let me know your thoughts on this topic in the comments below.  Thank you for reading and for following along on my parenting journey.