Something Playful: The Play dough Edit

The difference between play dough that gets played with for twenty minutes and playdough that gets played with for twenty seconds and then abandoned is almost always the setup. Here's what works.

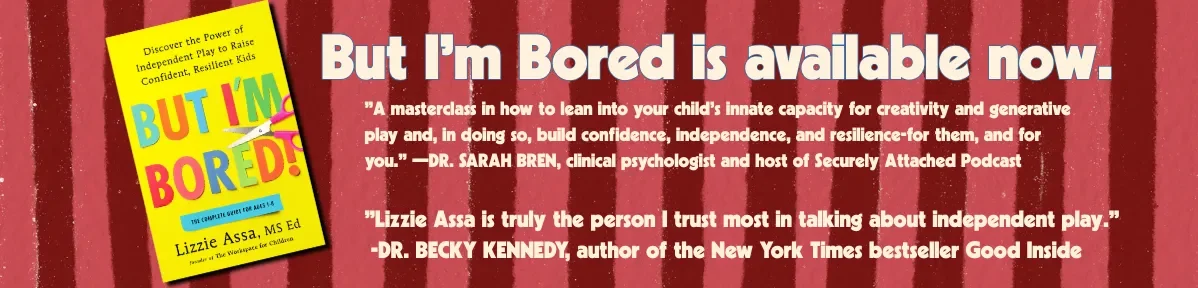
My book But I’m Bored is available now...

My youngest had just turned three, with big black olive eyes and a mop of curly, tangled hair to match. She loved dresses and lollipops and had a favorite pair of leg warmers that she’d squeeze over her legs, whether she was wearing pants or tights. She was humming a preschool song about squirrels and nuts as her chubby little hands squeezed a ball of homemade purple, sparkly playdough.

For twenty minutes, she was completely involved in a world of her own creation. Humming to herself, pressing eyes and buttons into little blobs of dough, bending string into legs, all while tending to the baby dolls that were carefully placed around the kitchen, each in its own cozy nest of fabric scarves and play silks. I stood at the counter, sipping cold coffee and watching her play.

Earlier that morning, while she and her older brother were crashing their OJ cups together, gleefully shouting “Cheers,” and stabbing their forks at soggy, syrup-drenched waffle bites, I decided to put out a tray of playdough on her little toddler table in the corner of our kitchen to see what would happen… It worked in my preschool classroom, so why not at home?

Later, when we got home from preschool drop-off and errands, groceries threatening to burst through the thin brown bag that housed them, and the frozen food starting to drip, I quickly opened a tightly sealed jar of playdough from my pantry, dumped the heavy, dense ball in the middle of the tray and filled the other sections with googly eyes, some bits of string, and a small pile of jumbo colored buttons.

I set it out on her table, and I didn’t say anything about what to make. I didn’t even draw her attention to it. I just set it down on the table and returned to putting our groceries away, already thinking about the piles of laundry waiting to be folded.

And here’s the thing about playdough that I’ve been saying since I first set foot in a preschool classroom a million years ago: it is one of the only materials that children still get to use completely on their own terms. No instructions or right answer. No finished product to aim for. Just dough and their hands and whatever story they decide to tell.

That’s not an accident. That’s by design.

Below: my favorite recipe, the ziplock storage trick that keeps it fresh for months, four ways to set it up so they’ll actually stay with it, and which accessories to keep and which to ditch.

Playdough is first. Over the coming weeks, I’ll be going one material at a time, bath toys, magnetic tiles, board games, art supplies, showing you how to use what you already have at home to get more independent play out of each one.

This is the week to start.

The Recipe

I’ve been making this same cooked playdough since 2001. I’ve tried other recipes. I always come back to this one. It’s smoother than the no-cook versions, lasts longer, and the texture is just right, soft, pliable, not sticky.

Simple Cooked Playdough

1 cup flour

½ cup salt

½ tbsp cream of tartar

1 cup water

2 tbsp cooking oil

Add a few drops of food coloring to the water before you mix for color. A drop of essential oil, lavender, peppermint, or lemon, makes it smell incredible and keeps kids at the table longer than you’d expect.

Combine everything in a non-stick pot and stir over medium-low heat. Keep stirring, it will start to look wrong before it looks right. When it pulls together and gets hard to stir, dump it onto a clean surface and knead while it’s still hot. Don’t add more flour! Just keep kneeding. Trust.

That last step is the one most people skip, and it’s the one that makes the texture perfect. The heat keeps cooking the dough as you knead, and you end up with something smooth and non-sticky that feels so satisfying to work with.

Here’s a tip you won’t find everywhere else: Candy oil scents are a huge hit with the kids. Make your dough smell like watermelon, bubblegum, or cotton candy. They love it.

Don’t feel like making it? I hear you. Sometimes I don’t either. The store-bought option is fine. It’s not that deep. Dollar store, drugstore, Amazon. Any playdough works.

Storage

Here’s a tip that took me too long to learn: Ziplock bags with all the air squeezed out. Not pretty glass jars. Not the little plastic containers. Ziplock bags, sealed tight. Roll the dough, pushing the air out to remove it, and seal. Homemade dough stored this way lasts months without drying out or growing mold. I’ve had batches go a full year. Make a big batch on a Sunday, bag it up, and done.

The Setup: Five Ways to Put It Out

The difference between playdough that gets played with for twenty minutes and playdough that gets played with for twenty seconds and then abandoned is almost always the setup. Here’s what works.

1. The Tinker Tray A divided tray, a chip and dip platter, or a silverware tray from the dollar store works perfectly, filled with a small selection of loose parts. Pom poms, googly eyes, pipe cleaners, buttons, toothpicks, whatever little things you have on hand. Set the dough in the middle and put the tray down without saying anything about what to make. The sections help kids organize their own thinking. When they can see their choices, they use them.

2. The Figurines Prompt Add a few small plastic animals or character figurines from their favorite show. Peg people or puppies, the dough becomes their world. A zoo, a magical forest, a dinosaur tunnel. The playdough is the home base. Everything else brings the story to life. Swap in whatever your kid is obsessed with right now. Gems, small blocks, or even pebbles are a great add-on.

3. The Construction Site Small trucks, rocks, sticks, and dough. The dough is the worksite dirt. Trucks dig through it, haul it, make tracks in it. This one is especially good for kids who aren’t naturally drawn to “making things,” it meets them where they already are. The dollar store miniatures section is worth a look — tiny shovels, small garbage cans, little fairies. All of it works.

4. The Tool Tray For the child who doesn’t want to touch the dough, and there are more of them than you’d think, set out tools instead of loose parts. This one is also great for the child who doesn’t like small world play but loves to tinker. A small rolling pin, scissors, a knife, a crinkle cutter, a fork, or some popsicle sticks. They can engage with the dough entirely through the tools while they warm up to the texture. Kids feel grown-up using real tools, and the engagement often surprises you.

The Independence Move

Set it up, say nothing about what to make, and stay nearby but do your own thing — fold laundry, drink your coffee, answer emails. The key is not hovering. Available, present, but not part of the play. Not asking what they’re making.

Not offering suggestions when they pause.

The pause is not a problem. It’s where their idea comes from.

Give them time and space to work however they want.

Some kids will stand and work- They are engaging their core, and it often helps wiggle-fidgety kids stay at the table longer. Don’t make a standing kid sit.

Some kids will play with playdough while also walking around to play with babies, build something with magnetic tiles, and return to the dough. THIS IS NORMAL. Kids are not meant to focus on one thing for a long period of time. If you watch children in a developmentally appropriate preschool, you’ll see them moving fluidly through many tasks in a single period.

And, if you’ve been asking “what are you making?” every three minutes, you’re not in trouble. We’ve all done it. But I want you to try an experiment that will blow your mind: don’t ask at all. Just watch.

When It’s Not Working

The most common reason playdough fails at home is too much, too soon.

A full set of accessories dumped out all at once.

Jars that are hard to open, half-empty, crumbly, or rock hard. By the time they get to the dough, they’re over it.

Instead, start with good dough and two or three things and nothing else.

And get rid of the flimsy plastic tools that come in most sets — they break, they frustrate, and kids give up on the whole thing because of them.

What I’d Actually Use in My Home or Classroom

If you want to know exactly what I’d put in a playdough setup — the rolling pin, the crinkle cutter, the right beads, the tray — I put together a full guide with everything I’d actually use, and why. It’s the shortcut to skipping the cheap stuff that breaks or frustrates kids and going straight to what works. You can find it here. Find that HERE.

Next week on Something Playful: Board Games. The ones worth buying, the ones that are actually fun for adults too, and the age-by-age guide to what works when — plus how to help kids lose gracefully without the whole thing falling apart.

x Lizzie

Here are a few more posts based on setting kids up for success, stepping back, and letting them lead:

Grounded in Play: The Childhood Secret Adults Are Desperate to Rediscover

You Don’t Have to Play With Your Kids Every Time They Ask

Stop Fixing Everything: What Kids Learn When You Let the Hard Moments Happen

Next
Next

There’s A Hidden Cost to "Helpful" Parenting